Ultimate Guide to Low-fat Baking

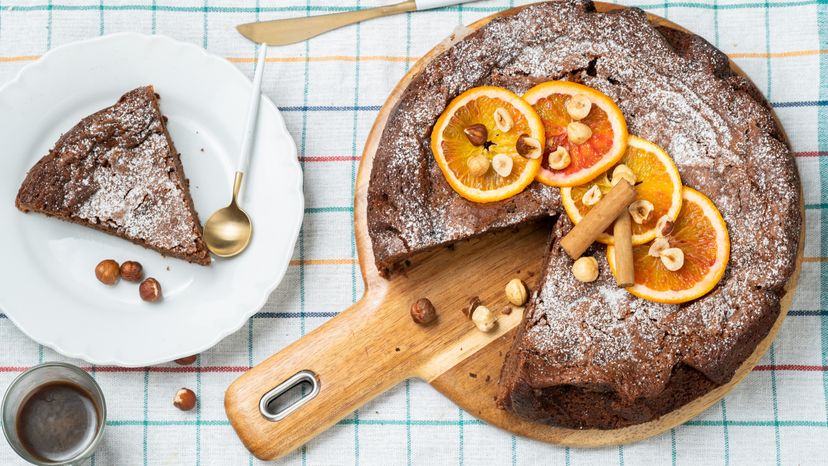
A cake decorated with dried red orange and cinnamon stick
Reduced- and low-fat batters are more sensitive to overmixing, overbaking, ingredient substitutions, and etc. Carlo A / Getty Images

There is a big difference between low-fat baking and conventional baking. Fat forms the backbone of most baking recipes, and when the fat is reduced or eliminated, there is a whole new set of rules. I learned low-fat baking the hard way, by trial and error, and through developing a 12 muffin and cake baking mix line called Healthy Oven Low-Fat Baking Mixes.

In this article, I would like to show you how low-fat baking works. The techniques described here are excerpted from my cookbook entitled The Healthy Oven Baking Book. By learning these techniques you will be able to enjoy low-fat baked goods from my cookbook and others, and you will also be understand how to experiment with and modify existing recipes to reduce the fat content significantly! However I must caution you, not all recipes are easily reduced in fat, particularly butter-based recipes. You can ask me baking questions and look up information on my Web site, www.baking911.com.

Advertisement


An Example

Perhaps the best way to illustrate how reduced-fat baking works is to tell the story of how I gave my mom's chocolate fudge cake a makeover with Fudgy Chocolate Frosting. It didn't happen overnight.

I have vivid memories of Mom in the kitchen, instinctively mixing up her famous chocolate fudge cake in a big bowl. She made it so many times, she never had to look at the recipe. I learned it by heart, too: two sticks of butter, two cups of sugar, two whole eggs (Mom preferred double-yolk), one-half cup of sour cream, two cups of sifted all-purpose flour, three ounces of unsweetened chocolate, one cup of hot brewed coffee, one teaspoon of baking soda, and a pinch of salt. The frosting had four more ounces of chocolate, one pound of confectioners' sugar, and one teaspoon of vanilla, mixed with a whole raw egg (I doubt if she'd use a raw egg today) and a few tablespoons of whole milk.

Advertisement

When my family decided to pay more attention to our diet, I knew that Mom's chocolate fudge cake, as it stood, didn't fit into the plan—especially after I ran the numbers on the original recipe. I almost fainted when the calculations showed 603 calories, 28 fat grams (11 grams of saturated fat), and 100 milligrams of cholesterol per slice (twelve slices per cake)! If I had announced to my gang that they would never eat chocolate cake again, they would have packed their bags and found a new mom and wife. But I knew that somewhere in Mom's beloved recipe there was a wonderful reduced-fat version just waiting to be discovered.

So, I rolled up my sleeves and got busy. Obviously, the place to start was with the butter. Fat serves several purposes in a baked good, primarily contributing to and enhancing the flavor. After much experimentation, I found that I could cut the fat down from sixteen to four tablespoons – 25 percent of its original amount—before the flavor and texture were adversely affected. (in other recipes, substituting a fruit puree like applesauce for part of the fat works well.) I also substituted low-gluten cake flour for the all-purpose flour, as cake flour will produce a more tender cake, which can be a problem win the absence of fat.

To make up for the flavor lost by reducing the amount of melted chocolate, I added one-half cup of cocoa powder, which is a surprisingly low-fat ingredient (see How Chocolate Works for details). In addition I added two teaspoons of instant espresso to complement the chocolate flavor. I used low-fat buttermilk which has a similar full, rich flavor to sour cream, but fewer calories and less fat.

Egg yolks provide fat and lecithin (a natural emulsifier), which contribute to the fine texture of baked goods, and egg whites contain proteins that give structure to the final product. I could have substituted four egg whites for the two whole eggs, but I kept one egg and substituted two whites for the other. The little bit of lecithin in that one yolk made a big difference. Too many egg whites will make a baked good dry and rubbery.

Finally, I added an important instruction to the recipe: "Do not open the oven until the last five minutes of baking." All low-fat and reduced-fat baked goods are extremely sensitive to shifts in oven temperature (which occur when the door is opened) and could fall.

Of course, I didn't get it right on the first try. But, get it right I did, because I came to understand the interplay between the ingredients and the techniques used in reduced-fat baked goods. And finally, after many trials, I came up with a rich, delicious, chocolate cake and a new fudgy frosting that my family loves. This Chocolate Fudge Layer Cake with the Fudgy Chocolate Frosting, was reduced by over 280 calories, 18 grams fat (6 grams saturated fat), and 69 mg cholesterol, per slice!

Advertisement

Understanding Low-Fat Baking

The rules for low-fat baking are completely different from those for traditional full-fat baking. Reduced- and low-fat batters are more sensitive to overmixing, overbaking, ingredient substitutions, improper measuring, oven temperatures, and choice of baking pans. Practically every baked good, traditional or reduced-fat, is created from a balance of many components. A recipe is a culinary formula. Each component has a role to play in the formula and the success of the final result. It is important that the baker understands how these ingredients work, and why they require different mixing and baking methods than the ones my mom taught me when I was first learning my way around the kitchen.

For example, most of Mom's recipes start with a large amount of butter, which through creaming with crystalline sugar, creates and traps air and moisture in the batter. In reduced-fat baking, the butter is significantly reduced or eliminated altogether, and the fat is often replaced by a fruit puree and other ingredients. If butter is used at all, it is as a flavoring.

Advertisement

Here are the basic components that you'll find in almost every recipe for any baked good.

Strengtheners

Wheat flours and egg whites contain proteins that provide strength for a batter or dough so it will rise and not collapse when baked. When wheat flour is moistened and stirred, two proteins in the flour, glutenin and gliadin, connect and cross-connect to form strands of gluten, which help give structure to the baked good. Wheat is the only grain with significant amounts of gluten-forming potential. Other grains like corn and oats, and therefore products like cornmeal and oatmeal, do not create gluten in a batter. They provide only flavor and bulk, and must be mixed with wheat flour for strength.

Depending on the type of wheat and where and when it was planted, the resulting flour can be high-gluten (milled from hard winter wheat), low-gluten (from soft spring wheat), or moderate (a combination of the two). Baked goods made from high-gluten flours have a firm crumb; low-gluten flours give more tender results, and goods made from flours with a moderate gluten content fall somewhere in between.

The more a batter is stirred, the stronger the gluten becomes. Fat, which is not present in reduced-fat baking in traditional amounts, plays an important role in coating the proteins in flour, minimizing their contact with moisture, and shortening the gluten's development. Without the fat lubricator, the gluten strands form more readily. That is why it is very important to never overmix a reduced-fat batter. You'll see the phrase "Do not overmix" in practically every recipe in my book.

I often use unbleached all-purpose flour, which has a moderate gluten content. For a lower gluten content with a more tender outcome, I use whole wheat pastry flour or cake flour. In a few cases, I also use high-gluten, regular whole wheat flour. Each recipe is written with a specific flour in mind to give the best results.

Shortening (Fats)

Most bakers are very familiar with traditional shortenings such as butter, margarine, and vegetable shortening. Shortenings coat the flour proteins, reducing their contact with the moisture in the recipe, and shortening the length of the gluten strands when the flour is stirred with that moisture (that's why they're called "shortenings"). In traditional baking, where solid fats are creamed with crystalline sugar, tiny air cells are whipped into the batter, so the baked good will have a fine, aerated texture. When a shortener is removed or reduced, it increases the chances that the end product will lack flavor and be tough and full of tunnels. The new mixing methods in this book reduce this possibility.

Butter makes a very important flavor contribution, whereas margarine does not have as fine a texture and taste, so when choosing a shortening, I always go for the butter, but in the small amounts that are needed to retain a great taste and aroma. If you have dietary restrictions that make it necessary for you to reduce saturated fats in your diet, you can substitute a butter-margarine blend. The recipe won't taste the same if you use margarine. Vegetable oil does not act as a shortener because it is a liquid and won't cream with crystalline sugar in the same way as a solid fat. It reduces dryness and enhances flavor, so I use it sparingly because it has the same number of calories and fat grams as butter, even though it has less saturated fat.

Advertisement

Fat Substitutes

Fat Substitutes (Fruit Purees)

Fruit purees, especially applesauce, are often used as fat substitutes. The pectin from the fruit forms a film around the tiny air bubbles in the batter, similar to what occurs when you cream solid shortenings with sugar, but not as effectively.

Advertisement

My favorite fruit puree for baking is unsweetened applesauce. Not only is it readily available but it is inexpensive and versatile because it doesn't impart any strong flavor to the final result. Applesauce contains more pectin than other fruit purees, which helps to retain the moistness of baked goods. Even if a recipe is flavored with another fruit puree, I always add a little applesauce as well.

You'll see recipes here that use pumpkin, banana, and prune purees, among others.

Sweeteners

Sugars provide sweetness and flavor. Crystalline sugars, such as granulated white sugar and brown sugar, are integral to the creaming process that incorporates air into batters. Sugar also inhibits gluten formation, which means that sugar helps make baked goods tender. Honey and corn syrup are liquid sweeteners, and while they do provide sweetness, they do not cream well, just as liquid vegetable oils can't substitute for solid shortenings.

Leaveners

Most desserts are leavened with baking soda or baking powder, or by the air beaten into egg whites. (Yeast, not used in this book also makes baked goods rise.)

Baking soda (bicarbonate of soda) is alkaline. When it comes in contact with an acidic ingredient like applesauce, buttermilk, or lemon juice and is moistened, the alkali/acid combination creates carbon dioxide. This carbon dioxide expands the air bubbles previously formed by creaming, and makes the baked good rise. In some recipes, depending on the quantity of acidic ingredients included, a combination of baking soda and baking powder is used for better flavor and texture.

Baking powder does not need an acidic ingredient to release its leavening power. Double-acting baking powder begins releasing carbon dioxide as soon as it is moistened, and again when heated in the oven. Some baking powders include sodium aluminum sulfate, but there are aluminum-free baking powders that work just as well, and I prefer them. Look for a brand like Rumford's at natural food stores or many supermarkets.

Thickeners

Not every recipe includes a thickener, although flour certainly has thickening attributes. But many fruit fillings include cornstarch to thicken the juices. I occasionally use tapioca as a thickener, as well.

Flavorings

Flavorings enhance a baked good's aroma and taste. The butter in traditional recipes contributes to and carries flavors throughout the batter. Even more important, butter has flavor of its own that, when it interacts with sugar, is responsible for the caramelized baked taste we associate with baked goods. In reduced-fat baking, the flavorings must be increased to compensate for the reduction in butter.

Advertisement

Steps to Successful Low-Fat Baking

There are a few familiar baking procedures that are a bit different in reduced-fat baking. Use these techniques when preparing low-fat recipes and you'll have success every time.

Measuring

Advertisement

All of the flour in this book has been measured by the spoon-and sweep method. This method is becoming a common low-fat technique and many food magazines, such as Cooking Light, use it. Flour settles, and can compact itself in its bag in the long journey from the mill to the grocer to your home. In order to give your baked goods a nice, light crumb, the flour must be aerated. The best place to start is when the flour is measured. If you measure the flour with the scoop-and sweep method (by dipping the cup into the bag and sweeping the excess flour off the top with a knife), you will be baking with compacted flour, and you could end up with a dense, dry baked good.

It's so important to remind you of the spoon-and sweep measuring method, that I have stated the procedure next to every flour measurement in my book. I once calculated the difference in weight between one cup of spooned and one cup of scooped whole wheat pastry flour. It was almost an ounce, which is 20 percent! That will make quite a big difference in the final taste and texture of the recipe.

To measure by the spoon-and sweep method, place the dry measuring cup on a plate or piece of waxed paper (to catch the excess flour). Using a large spoon, stir the flour in the bag or container, and lightly spoon it into the cup until it overflows. Do not pack the flour in the cup. Using a knife (or even you finger), sweep off the excess flour so it is level with the top of the cup. Cocoa can be lumpy unless sifted. In that case, measure the cocoa and sift it. It is fine to measure the other dry ingredients in the book by scooping, as long as you use level measures.

Always use metal measuring cups for dry ingredients, and a glass measuring cup for liquid ingredients. For dense, moist ingredients, such as applesauce, peanut butter, and yogurt, use level amounts in a metal measuring cup. When measuring buttermilk and sticky liquid ingredients like corn syrup, molasses, or honey, place the glass measuring cup on a work surface, and measure the liquid at eye level. Don't hold the glass up in the air, or you can make an inaccurate measure. To help remove sticky liquids from the measure, spray the inside with nonstick canola oil spray before measuring. Be sure to scrape all the ingredient out of the measure with a rubber spatula.

Nonstick Baking pans

To reduce sticking, always use nonstick pans and muffin tins sprayed with canola or vegetable oil spray. Low-fat batters especially stick to the surfaces of regular baking pans without a nonstick lining. In that case, generously spray with oil. Do not use disposable aluminum foil pans, which absorb the oven heat unevenly and have hot spots. To be sure that your cake unmolds easily from the pan, optionally line the bottom of a nonstick pan with a piece of waxed or parchment paper. Generally, I don't recommend paper muffin liners, as some batters stick to them no matter what you do. If you use them, spray the insides of the liners with oil.

Try to use nonstick insulated cookie sheets—they encourage even browning much better than the regular sheets. Lightly spray with oil. You can simulate these double-thick sheets by stacking one regular cookie sheet inside another. If your sheets don't have a non-stick coating, generously spray or line the pans with waxed paper or baking parchment (no need to spray the parchment paper).

I prefer ovenproof glass pie plates. They distribute the heat better than metal ones, and you can look underneath to see how the crust is browning. I also prefer ovenproof glass pans for fruit-based desserts, but you can use nonstick metal ones as well. Although glass manufacturers recommend reducing the oven temperature by 25 degrees F when using their products, I never do it, and my pies and fruit desserts always turn out fine. Generously spray any ovenproof glass pans with oil.

Mixing

Even though all these recipes can be mixed by hand, I use a KitchenAid portable electric mixer to whip the liquid ingredients into a froth. Almost everyone has one. (The volume of liquid ingredients is too shallow for the beaters of a heavy-duty standing mixer to work properly.) Never use an electric mixer to mix in the flour. It will overdevelop the gluten, and toughen the baked good. Always stir in the flour with a spoon, just enough to moisten.

Advertisement

Preheating the Oven

In any kind of baking, a properly preheated oven is a key to success. It usually takes about twenty minutes for an oven to reach the desired temperature, so be sure to allow enough time. Always double-check the oven temperature with a free-standing oven thermometer. Never believe the temperature on your thermostat dial—these thermostats are notoriously unreliable.

The position of the rack is another important point. Before turning on the oven, adjust the rack to position designated for the recipe. Heat rises, and if a cake, for example, is baked n the top third of the oven, it will brown, and possibly burn, more quickly than one baked in the center rack.

Advertisement

Some pastry recipes require a pie to be baked on a baking sheet (it doesn't have to be nonstick) in the lower third of the oven. In a gas oven, this places the pie plate nearest the source of heat. In an electric oven, place the sheet in the center rack. You don't want the baked good to be too close to the heat source, or it will burn. The hot baking sheet gives the pie dough a flat, solid surface to bake on, which promotes and evenly browned, crisp crust and catches any drips.

When making regular cookies, some people bake two sheets at a time, switching the position of the sheets halfway through baking. This doesn't work with reduced-fat cookies, as the hot air should be encouraged to circulate to brown the cookies evenly, and the second sheet blocks the circulation. Bake cookies one sheet at a time, in the center of the oven. If you have only one baking sheet, line it with parchment paper so you can move quickly to the second batch without having to wash the sheet. However, the sheet should be cooled before using it again. Don't cool cookie sheets by rinsing them under cold water, or they could warp.

Doneness

Watch out for overbaking! It's a major cause of low-fat baking failures, whether you are baking cakes, cookies, or quick breads. Low-fat baked goods may have moist, shiny tops and look underdone, but those looks can be deceiving.

Low-fat cake baking has a different set of doneness tests from traditional baking. In full-fat baking, the most common method of testing for doneness is to insert a toothpick or a thin wire cake tester into the center of the cake. If the toothpick comes out clean without any unbaked batter clinging to it, the cake is done. The toothpick test doesn't work with reduced-fat baking, which requires other visual and tactile tests to be sure the baked good is baked through. This also holds for muffins and quick breads.

  1. To avoid overbaking, check for doneness at the beginning of the specified time range.
  2. Unless specified in the recipe, the top will spring back when gently pressed in the center.
  3. The edges are lightly browned and are beginning to pull away from the sides of the pan. Some quick breads will develop a large crack running down the top—it's normal.

Bake cookies until they are very lightly browned around the edges. The centers may seem underdone, but they will firm upon cooling. If the cookies cool and harden onto the sheet, return the sheet to the oven for a few seconds or so until the cookies soften (they won't stick to nonstick sheets).

Pie crusts should be baked until golden brown. If a pie crust is over-browning before the filing is done (the center should jiggle only slightly when the pie is shaken), protect the crust by covering it with strips of aluminum foil.

CoolingSome baked goods are meant to be eaten right out of the pan, and can be cooled in the pan on a wire cake rack. For cake and loaf recipes that require unmolding, place the pan on a wire cake rack and let it stand for 10 minutes. Run a knife around the inside of the pan to release the cake from the sides, then invert it onto the rack. If the loaf pan has been lined with waxed paper, carefully peel it off the loaf. Turn the loaf right side up and cool completely on the rack. A few cakes and quick breads may sink slightly in the center when cooled. When they are sliced, the indention won't be so noticeable, so don't worry about it. Cool cookies on a wire cake rack.

StorageMost reduced-fat baked goods will keep for up to two days at room temperature, wrapped in aluminum foil. Foil works better than plastic wrap or plastic bags, which hold in the moisture. (Because of the moisture-attracting properties of fruit purees, low-fat baked goods can "sweat.") However, cookies keep best in zip-tight plastic bags. You can refrigerate the baked goods if you wish, but most of them are best if served at room temperature. Well wrapped in aluminum foil and placed in a zip-tight bag, they can also be frozen for up to two months. Always cool baked good completely before storing. Store all frosted cakes, cheesecakes, and pies in the refrigerator.
Advertisement

Advertisement

Loading...