How to Garnish

Dazzle your guests with a stunning candied lemon rosebud accenting a luscious cheesecake. Wow your family with a delicate tomato rose topping off a platter of creamy fettuccine.

Garnish Recipes

Entice little ones with a plate trimmed with fun gelatin cutouts and colorful carrot flowers -- the list of eye-catching garnishes is endless.

In this article, we'll show you how to add excitement to any food with eleven sections of creative garnishes. With easy-to-follow step-by-step instructions and clear how-to photos, you'll soon progress from a basic radish fan to an impressive chocolate lead with ease.

Advertisement

Tools for Garnishing

Food that tempts the eye is more likely to tempt the taste buds. When a meal is presented with panache, your guests are more likely to eat and enjoy it. Just as you rely on the equipment in your kitchen to help you turn out a good meal, you'll also need a few tools to create spectacular garnishes. This handy glossary lists the most common kitchen tools used in garnish making. Apple cutter/corer

This wheel- shaped gadget is great for cutting vegetables, such as carrots, as well as apples.

Brushes

Standard pastry brushes work for most garnishing, but for precise or delicate chores, a child's small paintbrush is best.

Butter curler, butter paddles and candy molds

Each of these helps you shape butter. Use the curler to form delicate butter curls, the paddles for butter balls and the molds for special designs. Candy molds are also known as butter molds.

Citrus stripper

Use this tool to cut a thin strip of peel from citrus fruit or other fresh produce.

Decorating bag

Use these items for piping designs and other cake- decorating tasks. The decorating bag is also known as a parchment cone.

Decorating tips

The tips you'll use most often are writing tips, star tips, rose tips, and leaf tips. Start out by purchasing one of each type. Then add to your collection whenever you need an additional tip for a new garnish.
Tools for garnishing.
©2006 Publications International, Ltd.
Row 1: Sieve, Apple Cutter, Butter Curler and Paddles, Hand Grater.
Row 2: Scissors, Parchment Cone, Skewers and Toothpicks, Knives.
Row 3: Vegetable Peeler, Decorating Tips.
Row 4: Brushes, Small Cookie Cutters, Grapefruit Knife, Melon Baller, and Citrus Stripper.
Grapefruit knife

The jagged edges on this knife come in handy for many garnishing tasks.


Hand grater

A grater with at least one section for fine pieces and another section for larger shreds is the most practical.

Small cookie cutters

These are sold in most cookware shops. Choose the shapes you think you'll use most often.
Small cookie cutters are also known as hors d'oeuvre cutters.

Knives

Sharp knives are a must. The knives you'll use most often are a chef's knife for cutting large items, such as watermelons; a utility knife for medium-sized foods, such as pineapples or cantaloupes; and a paring knife for all-purpose cutting.

Melon baller

This handy tool comes in a variety of sizes. The one that is the most versatile is the 1-inch-diameter size.

Scissors

A small pair is ideal for snipping small items, such as green onion tops. Kitchen scissors or poultry shears are better for large, tough jobs.

Skewers and toothpicks

For garnishing, keep a supply of wooden toothpicks, as well as 6- and 10-inch wooden skewers, on hand. Occasionally you may need a metal skewer. Choose one about 8 inches long.

Vegetable peeler

The swivel- type of peeler works best. Just make sure it's sharp.

Wire strainer

This bowl-shaped tool made from wire mesh is great for sifting or sprinkling powdered sugar or cocoa over foods, as well as for draining foods. Wire strainers are also known as sieves.

Cues for Bright, Colorful Garnishes

Once cut, some foods discolor quickly, e.g. pears, apples, bananas, avocados, potatoes and eggplant. To slow the discoloration process down, brush the cut surfaces with lemon juice before wrapping and refrigerating.

To make garnishes last:

To maintain and heighten the color of fresh vegetables, blanch them before using them to make garnishes. Simply immerse the produce in boiling water for 1 minute, drain, and plunge into a large bowl filled with ice water or rinse quickly under very cold running water. Always dry the ingredients thoroughly before use.

This chocolate garnish adds to the look of the dessert.'
©2006 Publications International, Ltd.
This chocolate garnish was added
to the cake just before serving.

To prevent drying out, keep garnishes away from air and heat. If possible, protect them with an airtight covering of plastic wrap.

It's always best to make garnishes just before serving, but some can be prepared ahead of time and assembled on the plate at the last minute.

Store garnishes like you would similar foods. If made with ingredients that are normally refrigerated, wrap in plastic wrap, or store in an airtight bag or container, and refrigerate.

If the ingredients are crispy or dried, or if they need to firm up, do not refrigerate. Store in a cool, dry place for several hours or overnight.

Some cut-up or carved vegetables can be prepared in advance and covered with ice water until you are ready to assemble the finished presentation. Be sure to drain and dry them off well before placing the garnishes on the plate.

Add garnishes to the food just before serving.

Advertisement

Citrus Garnishes

Brightly colored fruit garnishes add a sense of freshness and fun to foods. They're so naturally beautiful it doesn't take much effort to make them look spectacular. Look for citrus fruits that are evenly shaped, blemish-free, and at the right stage of ripeness. In general, the firmer the fruit, the easier it is to work with and the longer the finished garnish will stay fresh and attractive. Any kind of citrus works: use lemons, oranges, or limes to start garnishing.

Candied Citrus Peel

Tiny strips of candied citrus peel are the perfect topping for everything from espresso to cakes.

To candy citrus peel
garnishes :

Wash fruit; dry thoroughly. Cut strips of peel from fruit with vegetable peeler.

Cut strips with a vegetable peeler when making candied citrus peel garnish.
©2006 Publications International, Ltd.
Cut strips with a vegetable peeler.

Place the strips of peel on cutting board. If necessary, scrape cut side of peel with paring knife to remove white membrane.

Scrape side of peel when making candied citrus peel garnish.
©2006 Publications International, Ltd.
Remove white membrane by
scraping cut side of peel.

Cut peel into very thin strips.

Cut into thin strips when making candied citrus peel garnish.
©2006 Publications International, Ltd.
Cut into thin strips.

Combine equal amounts of sugar and water in small saucepan. Bring to a boil over medium heat, stirring constantly with wooden spoon. Boil 3 minutes.

You will need about 1-1/2 cups each of granulated sugar and water for each piece of whole fruit.

Carefully add strips of peel to boiling mixture.

Add peel strips to boiling mixture when garnishing.
©2006 Publications International, Ltd.
Add peel strips to boiling mixture.

Reduce heat to low. Simmer 10 to 12 minutes or until peel turns completely translucent.

Simmer until translucent when garnishing.
©2006 Publications International, Ltd.
Simmer until translucent.

Place wire strainer or sieve over bowl. Spoon strips of peel into strainer or sieve; drain thoroughly.

Spoon peel strips into sieve when garnishing.
©2006 Publications International, Ltd.
Spoon peel strips into sieve.

Add additional sugar to a re-sealable plastic food storage bag. Add strips of peel; seal bag. Shake until strips are evenly coated with sugar. Remove strips from bag; place on waxed paper to dry thoroughly.

Place strips on waxed paper when garnishing.
©2006 Publications International, Ltd.
Place strips on waxed paper.

Garnish as desired.

Garnish with finished Candied Citrus Knots.
©2006 Publications International, Ltd.
Garnish with Candied Citrus Peels.

Citrus Knots

Place a citrus knot on top of a lemon meringue, orange cream, or key lime pie to give a hint of what's inside.

To tie citrus knot garnishes:

Wash citrus fruit; dry thoroughly. Cut strips of peel from fruit with vegetable peeler.

Cut strips of peel when garnishing.
©2006 Publications International, Ltd.
Cut peel from fruit.

Place the strips of peel on cutting board. If necessary, scrape cut side of peel with paring knife to remove white membrane.

Scrape peel to remove membrane, if needed, when garnishing.
©2006 Publications International, Ltd.
Scrape peel to remove membrane.

Cut strips into 3-1/2 X 1/8-inch pieces.

Cut strips carefully when garnishing.
©2006 Publications International, Ltd.
Cut strips carefully.

Tie each piece into a knot.

Tie into a knot when garnishing citrus knots.
©2006 Publications International, Ltd.
Tie into a knot.

Garnish as desired.

Garnish with Citrus Knots.
©2006 Publications International, Ltd.
Garnish with finished Citrus Knots.

Citrus Loops

At your next dinner party, garnish the edge of each water glass with a citrus loop. This also works well on the edge of salads placed in beautiful bowls.

To make citrus loop garnishes:

Wash citrus fruit; dry thoroughly. Place fruit on cutting board; cut crosswise into thin slices with utility knife.

Cut citrus lengthwise into slices when garnishing.
©2006 Publications International, Ltd.
Cut citrus lengthwise into slices.

Cut each slice in half crosswise.

Carefully cut each half slice between peel and fruit with paring knife to loosen peel from fruit, cutting about three-fourths around the inside of the peel. (Fruit should remain attached to about one-fourth of the length of the peel.)

Leave a part of the peel attached to the fruit when garnishing.
©2006 Publications International, Ltd.
Leave a part of the peel attached to the fruit.

Holding free end of peel, carefully curl it under, tucking it up against attached part of peel.

Curl peel under itself when garnishing.
©2006 Publications International, Ltd.
Curl peel under itself.

Garnish as desired.

Garnish with Citrus Loops.
©2006 Publications International, Ltd.
Garnish with Citrus Loops.

Scored Citrus Slices

Pair scored citrus slices with fresh herbs and garnish on pork or fish dishes.

To score citrus slice garnishes:

Wash citrus fruit; dry thoroughly. Cut a shallow groove into the peel with citrus stripper or tip of grapefruit spoon, cutting lengthwise from stem end to other end.

Cut a shallow groove into peel when garnishing.
©2006 Publications International, Ltd.
Cut a shallow groove into peel.

Continue to cut grooves about 1/4 inch apart until completely around fruit.

Cut grooves around the entire fruit when garnishing.
©2006 Publications International, Ltd.
Cut grooves around the entire fruit.

Place fruit on cutting board; thinly slice crosswise with paring knife.

Slice crosswise when garnishing.
©2006 Publications International, Ltd.
Slice crosswise.

Garnish as desired.

Garnish with Scored Citrus Slices.
©2006 Publications International, Ltd.
Garnish with Scored Citrus Slices.

Advertisement

Fans, Flowers, and Butterfly Garnishes

Maybe it's the joy of summer that inspires us in the kitchen. Color is blooming all around us, flowers look fresh, butterflies playfully dart all around. Despite their seasonal inspiration, you can use these garnishes all year long.

Mini Strawberry Shortcakes

Make strawberry shortcake, one of America's all-time favorite desserts, extra-special by adding a dollop of whipped cream and a strawberry fan.

To make strawberry fan garnishes:

Select a medium sized, uniformly shaped strawberry with hull attached. Wash and dry thoroughly.

Place the strawberry on cutting board. Cut four or five thin slices with a paring knife lengthwise through the strawberry, leaving slices attached just below the hull.

Cut a few thin slices with paring knife when garnishing.
©2006 Publications International, Ltd.
Cut a few thin slices with paring knife.

Fan slices apart slightly, being careful to keep all slices attached to hull. Place on plate or food to secure in position.

Fan slices apart.
©2006 Publications International, Ltd.
Fan slices apart.

Garnish as desired.

Garnish with strawberry fan.
©2006 Publications International, Ltd.
Garnish with Strawberry Fans.

Cherry Flowers

Add a hint of color to individual servings of rice pudding by trimming with a cherry flower and a small sprig of mint.

To make cherry flower garnishes:

Place a cherry on cutting board. Cut it into six wedges with a sharp paring knife, being careful not to cut through bottom third of cherry.

Cut cherry into six wedges when making garnishes.
©2006 Publications International, Ltd.
Cut cherry into six wedges.

Use the tip of the knife to gently separate and spread the cherry segments to resemble flower petals.

Gently pull the cherry segments to make petals when makign cherry flower garnishes.
©2006 Publications International, Ltd.
Gently pull on the cherry segments
to make petals.

If desired, place a tiny piece of candied fruit or peel in center of flower and accent with leaves of fresh mint.

Garnish as desired.

Garnish with finished Cherry Flowers.
©2006 Publications International, Ltd.
Garnish with finished Cherry Flowers.

Sugared Fruit

Trim a silver tray with elegant pastries with delicate sugared fruit.

To make sugared fruit garnishes:

Wash fruit. Gently blot dry with paper towels or let air-dry on paper towels.

Beat egg white in small bowl with fork until foamy.

Beat egg whites until foamy when garnishing.
©2006 Publications International, Ltd.
Beat egg whites until foamy.

Brush egg white onto each piece of fruit with paintbrush or pastry brush, coating all sides of fruit thinly and evenly.

Brush egg white onto fruit when garnishing.
©2006 Publications International, Ltd.
Brush egg white onto fruit.

Place fruit on waxed paper that has been covered with granulated sugar. Sprinkle a light even coating of sugar over fruit with teaspoon.

Sprinkle sugar over fruit when garnishing.
©2006 Publications International, Ltd.
Sprinkle sugar over fruit.

Let sugared fruit stand at room temperature until coating is dry. Trim with nontoxic leaves, if desired.

Garnish as desired.

Garnish with Sugared Fruit.
©2006 Publications International, Ltd.

Sugared Flowers

Spruce up tortes, fruitcakes, or steamed puddings with a cascade of sugared flowers.

To make sugared flower garnishes:

Wash fresh, small, edible flowers such as geraniums, roses, nasturtiums, violets, and marigolds. Gently blot dry or let air-dry on paper towels.

Beat egg white in small bowl with fork until foamy, as pictured above.

Brush egg white onto each flower with paintbrush, coating both sides of petals thinly and evenly.

Brush flowers with egg whites.
©2006 Publications International, Ltd.
Brush flowers with egg whites.

Place flower on large sheet of waxed paper that has been covered with superfine sugar.

Place flower on waxed paper covered in sugar.
©2006 Publications International, Ltd.
Place flower on waxed paper
covered in sugar.

Spoon additional superfine sugar into sieve. Sprinkle a light, even coating of sugar over each flower. If any areas are not coated, repeat layers of egg white and sugar.

Sprinkle sugar from sieve onto flower.
©2006 Publications International, Ltd.
Sprinkle sugar from sieve onto flower.

Let sugared flowers stand at room temperature until coating is dry.

Garnish as desired.

Garnish with Sugared Flowers.
©2006 Publications International, Ltd.
Garnish with Sugared Flowers.

Lemon and Lime Butterflies

Add a flourish to baked cod by serving each portion with a delicate lemon butterfly.

To make lemon and lime butterfly garnishes:

Wash citrus fruit; dry thoroughly. Starting at one end of lemon, cut a thin strip of peel around fruit with vegetable peeler or citrus stripper.

Cut a thin strip of peel all the way around the fruit when garnishing.
©2006 Publications International, Ltd.
Cut a thin strip of peel all of the way
around the fruit.

Repeat, starting at the other end.

Peel fruit when garnishing.
©2006 Publications International, Ltd.
Repeat peeling from other side.

Place both strips on cutting board. Using paring knife, cut peel into very thin strips, each about 1 inch long.

Cut peel into very thin strips when garnishing.
©2006 Publications International, Ltd.
Cut peel into very thin strips.

Place the partially peeled lemon on cutting board. Cut off ends at place where peel has been stripped; discard ends.

Thinly slice remaining lemon crosswise.
©2006 Publications International, Ltd.
Thinly slice remaining lemon crosswise.

Thinly slice remaining lemon crosswise. Cut each slice into thirds.

Cut each slice into thirds.
©2006 Publications International, Ltd.
Cut each slice into thirds.

To make a butterfly, arrange two lemon wedges on desired food or plate, with points of wedges touching at center.

Arrange lemon wedges, with wedge points touching.
©2006 Publications International, Ltd.
Arrange lemon wedges,
with wedge points touching.

To make antennae, carefully place two strips of peel where pieces touch.

Place strips of peel at meeting point.
©2006 Publications International, Ltd.
Place strips of peel at meeting point.

Garnish as desired.

Garnish with citrus butterflies.
©2006 Publications International, Ltd.
Garnish with citrus butterflies.

Advertisement

Chocolate Garnishes

There's nothing like a creatively placed swirl, drizzle, curl, or flourish of chocolate to elevate an everyday dessert to gourmet status. It's one of the easiest ways to add drama and an impressive finishing touch. Try these quick tricks with chocolate next time you want to step it up a notch.

Chocolate Curls

Create a halo of chocolate curls on top of your favorite sweet treat. Or, top cups of coffee with dollops of whipped cream and chocolate curls. Make brownies extra special by frosting them with vanilla buttercream frosting. Then, top each one of the brownies with a chocolate curl.

To make chocolate curl garnishes:

Place square or bar of semisweet chocolate on cutting board; shave it into small pieces with paring knife.

Shave chocolate into small pieces.
©2006 Publications International, Ltd.
Shave chocolate into small pieces.

Place shavings in measuring cup. Add shortening. Use 1 teaspoon of shortening for every 2 ounces of chocolate. Fill a saucepan one-quarter full (about 1 inch deep) with warm, not hot, water.

Place measuring cup in water to melt chocolate, stirring frequently with rubber spatula until smooth. Be careful not to get any water into chocolate.

Place measuring cup in water to melt chocolate.
©2006 Publications International, Ltd.
Place measuring cup in water
to melt chocolate.

Remove measuring from saucepan. Let chocolate cool slightly.

Pour melted chocolate onto back of baking pan. Quickly spread chocolate into a thin layer (about 1/4 inch thick) with metal spatula.

Spread chocolate onto back of baking pan.
©2006 Publications International, Ltd.
Spread chocolate onto back of baking pan.

Let stand in cool, dry place until chocolate is firm. Do not chill in refrigerator. When chocolate is just firm, use small straight-edge metal spatula to form curls. Holding spatula at a 45-degree angle, push spatula firmly along baking pan, under chocolate, so chocolate curls as it is pushed. If chocolate is too firm to curl, let stand a few minutes at room temperature. Refrigerate again if it becomes too soft.

Scrape chocolate into a curl.
©2006 Publications International, Ltd.
Scrape chocolate into a curl.

Using small skewer or toothpick, transfer curls to waxed paper. Store curls in a cool, dry place until ready to use.

Transfer curls to waxed paper.
©2006 Publications International, Ltd.
Transfer curls to waxed paper.

Garnish as desired.

Garnish with Chocolate Curls.
©2006 Publications International, Ltd.
Garnish with Chocolate Curls.

Advertisement

Chocolate Cutouts and More

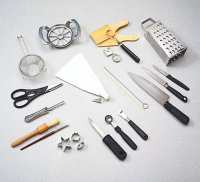
For your child's next birthday party, place a chocolate cutout alongside each serving of cake. Have the child help you by choosing the cookie cutter shapes he or she likes best.

To make chocolate cutout garnishes:

Place square or bar of semisweet chocolate on cutting board; shave it into small pieces with paring knife, as pictured above.

Place shavings in measuring cup. Add shortening. Use 1 teaspoon of shortening for every 2 ounces of chocolate. Fill a saucepan one-quarter full (about 1 inch deep) with warm, not hot, water.

Place measuring cup in water to melt chocolate, stirring frequently with rubber spatula until smooth, as pictured above. Be careful not to get any water into chocolate.

Line inside of baking sheet with waxed paper. Pour melted chocolate into prepared baking sheet; quickly spread chocolate into a thin layer (1/8 to 1/4 inch thick) with metal spatula.

Spread chocolate inside baking pan.
©2006 Publications International, Ltd.
Spread chocolate inside baking pan.

Let stand in cool, dry place until chocolate is just firm. Do not chill in refrigerator.

Cut chocolate into shapes with hors d'oeuvre or cookie cutters, placing cutters as close together as possible.

Cut chocolate into shapes with cookie cutters.
©2006 Publications International, Ltd.
Cut chocolate into shapes
with cookie cutters.

Carefully remove cutouts with metal spatula. Store the cutouts in a cool, dry place until ready to use.

Remove cutouts with metal spatula.
©2006 Publications International, Ltd.
Remove cutouts with metal spatula.

Garnish as desired.

Garnish with Chocolate Cutouts, like this chocolate star.
©2006 Publications International, Ltd.
Garnish with Chocolate Cutouts, like this chocolate star.

Baker's Tip!

For ease in cutting chocolate, slightly warm cookie cutters with hands before cutting out shapes.

Chocolate-Dipped Fruits & Nuts

For the perfect ending to a rich meal, serve cups of steaming hot coffee. Garnish each saucer with a chocolate-dipped fruit or nut.

To make chocolate-dipped fruit and nut garnishes:

Place square or bar of semisweet chocolate on cutting board; shave it into small pieces with paring knife, as pictured above.

Place shavings in measuring cup. As shown above, fill a saucepan one-quarter full (about 1 inch deep) with warm, not hot, water. Place measuring cup in water to melt chocolate, stirring frequently with rubber spatula until smooth. Be careful not to get any water into chocolate. Remove measuring cup from saucepan.

If using fresh fruit, wash and dry well. Dip fruits and nuts, one at a time, into melted chocolate, until chocolate coating comes about two-thirds of the way up the side. Allow excess chocolate to drip off.

Dip fruits into chocolate.
©2006 Publications International, Ltd.
Dip fruits and nuts into chocolate.

Transfer dipped fruits and nuts to waxed paper. Let stand in a cool, dry place until chocolate is firm. Do not chill in refrigerator.

Garnish as desired.

Garnish with Chocolate-Dipped Fruits and Nuts.
©2006 Publications International, Ltd.
Garnish with Chocolate-Dipped
Fruits and Nuts.

Melting & Piping Chocolate Drizzles

For a quick finish to cream puffs or éclairs, drizzle each pastry with chocolate before topping with toasted sliced almonds or pecan pieces.

To melt and pipe chocolate drizzle garnishes:

Place squares or bars of unsweetened, semisweet, or milk chocolate on cutting board; shave it into small pieces with paring knife, as pictured above.

Place shavings in measuring cup. Fill a saucepan one-quarter full (about 1 inch deep) with warm, not hot, water. Place measuring cup in water to melt chocolate, stirring frequently with rubber spatula until smooth, as pictured above. Be careful not to get any water into chocolate. Remove measuring cup from saucepan. Let chocolate cool slightly.

Fill plastic bag about half full with melted chocolate. Seal bag securely.

Fill plastic big with melted chocolate.
©2006 Publications International, Ltd.
Fill plastic big with melted chocolate.

Cut off very tiny corner of bag with scissors.

Use scissors to cut off top corner of bag.
©2006 Publications International, Ltd.
Use scissors to cut off top corner of bag.

Gently squeeze bag, piping chocolate onto cake, cookie, ice cream, or other dessert using an even, steady flow.

Garnish as desired.

Garnish with Chocolate Drizzles.
©2006 Publications International, Ltd.
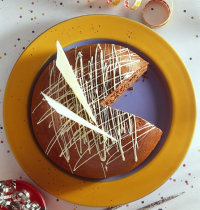
Garnish with Chocolate Drizzles,
as shown on these cream puffs.

Chocolate Shapes

For a dazzling display, bend chocolate into the shapes that you desire.

To make chocolate shape garnishes:

Place squares or bars of unsweetened, semisweet, or milk chocolate on cutting board; shave it into small pieces with paring knife, as pictured above.

Place shavings in measuring cup. Fill a saucepan one-quarter full (about 1 inch deep) with warm, not hot, water. Place measuring cup in water to melt chocolate, stirring frequently with rubber spatula until smooth, as pictured above. Be careful not to get any water into chocolate. Remove measuring cup from saucepan. Let chocolate cool slightly.

Fill plastic bag about half full with melted chocolate, as pictured above. Seal bag securely.

Cut off very tiny corner of bag with scissors, as pictured above.

Gently squeeze bag and pipe chocolate in a steady flow onto sheet of waxed paper, making a variety of small shapes. Stop squeezing and then lift bag at end of each shape. Create flowers, hearts, Christmas trees, lattice shapes or any lacy pattern.

Squeeze chocolate into desired shape.
©2006 Publications International, Ltd.
Squeeze chocolate into desired shape.

Let stand in cool, dry place until chocolate is firm. Do not chill in refrigerator. When chocolate is firm, gently peel shapes off waxed paper. Store shapes in cool, dry place until ready to use.

Gently peel shapes off waxed paper.
©2006 Publications International, Ltd.
Gently peel shapes off waxed paper.

Garnish as desired.

Garnish with Chocolate Shapes.
©2006 Publications International, Ltd.
Garnish with Chocolate Shapes.

Melting & Piping White Chocolate Drizzles

These drizzles not only look great against a brownies, they also melt in your mouth.

To melt and pipe white chocolate drizzle garnishes:

Place white chocolate baking bar in small resealable plastic freezer bag.

Microwave at medium (50% power) 2 minutes. Turn bag over; microwave at medium 2 to 3 minutes or until white chocolate is melted.

Knead bag until white chocolate is smooth.

Knead bag to smooth white chocolate.
©2006 Publications International, Ltd.
Knead bag to smooth white chocolate.

Cut off very tiny corner of bag with scissors.

Gently squeeze bag, piping white chocolate onto cake, cookie, ice cream, or other dessert using an even, steady flow.

Pipe white chocolate onto dessert.
©2006 Publications International, Ltd.
Pipe white chocolate onto dessert.

White Chocolate Curls

Decorate cannolis and other delicious desserts with these curls.

To make white chocolate curl garnishes:

Place white chocolate baking bar on cutting board; shave it into small pieces with paring knife.

Place white chocolate shavings and shortening in measuring cup. Use 1 teaspoon of shortening for every 2 ounces of chocolate.

Microwave on high (100% power) about 1-1/2 minutes or until melted, stirring after every 30 seconds of cooking.

Pour melted white chocolate onto back of baking pan. Quickly spread chocolate into a very thin layer (about 1/8 to 1/4 inch thick) with metal spatula. Refrigerate white chocolate about 10 minutes or until firm, but still pliable.

Spread white chocolate onto pan.
©2006 Publications International, Ltd.
Spread white chocolate onto pan.

Use small straight-edged metal spatula to form curls. Holding spatula at a 45-degree angle, push spatula firmly along baking pan, under chocolate, so chocolate curls as it is pushed. If chocolate is too firm to curl. Let stand a few minutes at room temperature. Refrigerate again if it becomes too soft.

Push spatula along pan to make white chocolate curl.
©2006 Publications International, Ltd.
Push spatula along pan to make
white chocolate curl.

Using small skewer or toothpick, transfer curl to waxed paper. Store curls in a cool, dry place until ready to use.

Transfer white chocolate curl to waxed paper with a toothpick.
©2006 Publications International, Ltd.
Transfer white chocolate curl to
waxed paper with a toothpick.

Garnish as desired.

White Chocolate Cutouts

These shapes are fun for kids and adults.

To make white chocolate cutout garnishes:

Melt white chocolate baking bar in small bowl set inside larger bowl half filled with very hot water, stirring occasionally. Do not use shortening.

Melt white chocolate bars inside two bowls.
©2006 Publications International, Ltd.
Melt white chocolate bars inside two bowls.

Line cookie sheet or baking pan with waxed paper. Pour melted white chocolate onto waxed paper; quickly spread chocolate into a thin layer (1/8 to 1/4 inch thick) with rubber spatula.

Spread on cookie sheet with rubber spatula.
©2006 Publications International, Ltd.
Spread on cookie sheet with rubber spatula.

Refrigerate until white chocolate is just firm, about 15 minutes.

Cut chocolate into shapes with sharp knife. You can also use cookie cutters, if desired.

Cut chocolate into shapes when making white chocolate cutouts for garnishing.
©2006 Publications International, Ltd.
Cut chocolate into shapes.

Immediately lift cutouts carefully from waxed paper with metal spatula or knife. Refrigerate until ready to use.

Garnish as desired.

Advertisement

Bell Pepper Garnishes

Whenever possible, it's a good idea to make garnishes before you get involved in the final tasks of meal preparation. Especially when you're entertaining, you don't have much time for details at the last minute.

Some garnishes, however, don't fare so well if they are made too far in advance. But that's not the case with many creative and colorful vegetable garnishes. Most can be made as much as a day ahead, then placed in airtight containers or wrapped in clear plastic wrap and refrigerated until the next day.

Look for vegetables that are evenly shaped, blemish-free, and at the right stage of ripeness to get the best results. In general, the firmer the vegetable, the easier it is to work with and the longer the finished garnish will stay fresh and attractive.

Bell Pepper Rings

Use bell pepper rings to garnish a burger.

To make bell pepper ring garnishes:

Make circular cut with paring knife around top of pepper.

Cut top of pepper with a paring knife.
©2006 Publications International, Ltd.
Cut top of pepper with a paring knife.

Pull stem from pepper; scoop out seeds and membrane with a spoon.

Pull stem from pepper.
©2006 Publications International, Ltd.
Pull stem from pepper.

Rinse pepper under running water to remove any excess seeds; drain well.

For rings, thinly slice pepper crosswise; remove any excess.

Slice pepper crosswise when making bell pepper ring garnishes.
©2006 Publications International, Ltd.
Slice pepper crosswise.

Garnish as desired.

Bell Pepper Cup

Use a pepper container in place of a bowl when serving creamy dips or guacamole. Or, use a bell pepper cup to hold celery and carrot sticks as an edible centerpiece.

To make bell pepper cup garnishes:

Place bell pepper on cutting board. Cut about 1/2 inch around stem with paring knife; discard stem.

Cut around stem with a paring knife.
©2006 Publications International, Ltd.
Cut around stem with a paring knife.

Remove and discard membrane and seeds. Wash the pepper under cold running water.

Remove and discard seeds.
©2006 Publications International, Ltd.
Remove and discard seeds.

If necessary, cut a thin slice off bottom of pepper to create flat surface. Stand pepper up. Fill as desired.

Cut a thin slice of pepper bottom to create a flat surface.
©2006 Publications International, Ltd.
Cut a thin slice of pepper bottom
to create a flat surface, if needed.

Garnish.

Garnish with Bell Pepper Cups.
©2006 Publications International, Ltd.
Garnish with Bell Pepper Cups.

Bell Pepper Basket

For an inventive presentation, fill pepper with single servings of tuna, egg, or ham salad. Serve on a bed of red-tipped romaine.

To make bell pepper basket garnishes:

Place pepper, stem end down, on cutting board. Break off stem if necessary, to get pepper to sit upright.

Break off stem if needed.
©2006 Publications International, Ltd.
Break off stem if needed.

Starting slightly off center, make a vertical cut from top of pepper just down to middle of pepper with paring knife.

Cut down the middle of the pepper.
©2006 Publications International, Ltd.
Cut down the middle of the pepper.

Make a second parallel cut 1/2 inch from first cut, creating the basket "handle."

Make a second parallel cut to create the basket
©2006 Publications International, Ltd.
Make a second parallel cut to create
the basket "handle."

Make a horizontal cut from side of pepper to first cut in pepper.

Make a horizontal cut.
©2006 Publications International, Ltd.
Make a horizontal cut.

Remove piece of pepper. Turn pepper around; repeat on other side.

Remove pepper pieces on both sides to make bell pepper basket garnishes.
©2006 Publications International, Ltd.
Remove pepper pieces on both sides.

Carefully remove membrane and seeds from pepper with paring knife; discard.

Remove seeds and membrane with paring knife.
©2006 Publications International, Ltd.
Remove seeds and membrane
with paring knife.

Wash pepper basket under cold running water. Fill as desired.

Garnish.

Garnish with Bell Pepper Basket.
©2006 Publications International, Ltd.
Garnish with Bell Pepper Basket.

Bell Pepper Triangles

Float a bell pepper triangle on the top of your favorite creamy soup.

To make bell pepper triangle garnishes:

Stand bell pepper, stem side up, on cutting board.

Stand pepper upright.
©2006 Publications International, Ltd.
Stand pepper upright.

Cut a slice, about 1/4 inch thick, off each side of pepper with paring knife.

Cut a slice off each side of the pepper.
©2006 Publications International, Ltd.
Cut a slice off each side of the pepper.

Remove membrane and seeds; discard.

Remove membrane and seeds.
©2006 Publications International, Ltd.
Remove membrane and seeds.

Cut each pepper slice into a rectangle 1-1/4 inches long and 3/4 inch wide.

Cut each pepper slice according to a ruler.
©2006 Publications International, Ltd.
Cut each pepper slice according to a ruler.

Starting one-third of the way from one long side of each rectangle, cut down remaining length of rectangle, ending 1/4 inch from other end.

Cut down remaining length of rectangle.
©2006 Publications International, Ltd.
Cut down remaining length of rectangle.

Turn rectangle around; repeat on other side.

To make each triangle, hold the two outer corners of a rectangle and bring both corners to center.

Bring both corners of rectangle to center.
©2006 Publications International, Ltd.
Bring both corners of rectangle to center.

Overlap ends to secure. If desired, place triangles in ice water to crisp. Remove; drain well.

Overlap ends of bell pepper triangle to secure.
©2006 Publications International, Ltd.
Overlap ends of triangle to secure.

Garnish as desired.

Garnish with Bell Pepper Triangles.
©2006 Publications International, Ltd.
Garnish with Bell Pepper Triangles.

Advertisement

Carrot Garnishes

Colorful carrots, crunchy peppers, and rotund radishes are just a few of the versatile vegetables that lend themselves to the art of food presentation.

Here are instructions for a garden's worth of garnishes that will make your reputation as a creative cook really grow. We'll talk about the different carrot garnishes.

Carrot Curls

Perk up a bowl of rice pilaf by trimming it with several carrot curls. Turn an ordinary club sandwich into a company combo but spearing it with a small wooden skewer laced with a carrot curl. One of the best ways to add color to broth-based soups is to float a carrot curl in each serving.

To make carrot curl garnishes:

Peel carrot with vegetable peeler; place on cutting board. Cut off ends with paring knife; discard tops.

Cut off ends of carrot with paring knife.
©2006 Publications International, Ltd.
Cut off ends of carrot with paring knife.

Cut paper-thin lengthwise strips from carrot with vegetable peeler.

Cut paper-thin strips when making carrot curl garnishes.
©2006 Publications International, Ltd.
Cut paper-thin strips.

Roll up strips into curls; secure with wooden toothpicks. Place carrot curls in ice water to chill thoroughly. Remove from water; drain well.

Roll up strips into curls.
©2006 Publications International, Ltd.
Roll up strips into curls.

Carefully remove toothpicks before using.

Garnish as desired.

Garnish with Carrot Curls.
©2006 Publications International, Ltd.
Garnish with Carrot Curls.

Carrot Flowers

Coax the children into eating their carrots by cutting the carrots into flowers. You can even make their favorite flower, such as black-eyed Susans or daisies.

To make carrot black-eyed Susan flower garnishes:

Peel carrot with vegetable peeler; place on cutting board. Cut off ends with paring knife; discard ends. Cut carrot in half crosswise.

Cut carrot in half crosswise.
©2006 Publications International, Ltd.
Cut carrot in half crosswise.

Cut out a thin, shallow lengthwise wedge from side of carrot. Lift out wedge with tip of knife; discard wedge.

Lift out carrot wedge with tip of knife.
©2006 Publications International, Ltd.
Lift out carrot wedge with tip of knife.

Give carrot a quarter turn. Cut out another wedge, as directed in step one. Repeat, turning and cutting two more times.

Cut carrot halves crosswise into 1/4-inch thick slices.

Cut carrot halves crosswise.
©2006 Publications International, Ltd.
Cut carrot halves crosswise.

Sprinkle chopped capers or caviar onto center of each carrot flower. Use chives or thin strips of green onion tops for stems and cilantro or parsley sprigs for leaves.

Garnish as desired.

Garnish with Black-Eyed Susan Flowers.
©2006 Publications International, Ltd.
Garnish with Black-Eyed Susan Flowers.

To make carrot daisy garnishes:

Peel carrot with vegetable peeler; place on cutting board. Cut off ends with paring knife; discard ends, as pictured above. Cut carrot into 1/2-inch-long pieces.

For each flower, set one carrot piece upright on board. Place the apple cutter/corer directly over the center of the carrot piece. Press down firmly and evenly, stopping about 1/2 inch from bottom.

Press down firmly and evenly.
©2006 Publications International, Ltd.
Press down firmly and evenly.

Push down on the carrot piece with your thumbs as you remove apple cutter/corer.

Carefully cut out center core of carrot at the base with tip of paring knife. Fill center of each flower with a black olive.

Cut out carrot core with a paring knife when making carrot flower garnishes.
©2006 Publications International, Ltd.
Cut out carrot core with a paring knife.

Garnish as desired.

Garnish with Carrot Daisies.
©2006 Publications International, Ltd.
Garnish with Carrot Daisies.

Carrot Stars

Create colorful canapes by spreading cracker or party rye bread slices with your favorite cheese spread. Top with carrot stars.

To make carrot star garnishes:

Peel carrot with vegetable peeler; place on cutting board. Cut the carrot with a paring knife at the spot where carrot begins to have a diameter of less than 1/2 inch. Discard thin end. Cut off stem end of carrot and discard.

Stand carrot on wide flat end. Cut a thin lengthwise slice from one side of carrot piece.

Cut a thin slice lengthwise.
©2006 Publications International, Ltd.
Cut a thin slice lengthwise.

Repeat four more times, turning carrot slightly after each cut, to make a pentagon shape with five equal sides.

Repeat four more times.
©2006 Publications International, Ltd.
Repeat four more times.

Cut a groove in center of each flat side using citrus stripper or tip of vegetable peeler. Cut carrot crosswise into thin slices with paring knife to form stars.

Cut carrot with a paring knife to form stars.
©2006 Publications International, Ltd.
Cut a groove in the center of carrot.

Garnish as desired.

Garnish with Carrot Stars.
©2006 Publications International, Ltd.
Garnish with Carrot Stars.

Advertisement

Cucumber and Zucchini Garnishes

Spice up everything from plain tomatoes to seafood bisque by using cucumber garnishes. Cucumbers make great garnishes.

There is a lot of cutting involved, but cucumbers hold up well and are easy to manipulate. Zucchinis can be used interchangeably in many of the cucumber garnishes.

Cucumber Twists

Brighten a Thai dish using these easy garnishes. You can also twist a slice of cucumber and slip it onto a platter or pan-fried pork chops.

One popular method of using this type of garnish is to use it as the centerpiece of a platter. Surround with salami or ham, cheese cubes, hard-cooked egg wedges and olives or peppers.

To make cucumber twist garnishes:

Place a small cucumber on cutting board. Cut off ends of cucumber with utility knife; discard ends. Diagonally cut cucumber into thin slices.

Diagonally cut cucumbers.
©2006 Publications International, Ltd.
Diagonally cut cucumbers.

Cut slit through each slice just to center.

Cut slit through each slice.
©2006 Publications International, Ltd.
Cut slit through each slice.

Holding each slice with both hands, twist ends in opposite directions. Place on plate or food to secure in position.

Twist slice in opposite directions when making cucumber twist garnishes.
©2006 Publications International, Ltd.
Twist slice in opposite directions.

Garnish as desired.

Garnish with Cucumber Twists.
©2006 Publications International, Ltd.
Garnish with Cucumber Twists.

Variation: Substitute lemon, lime, or orange slices for diagonally cut cucumber slices; continue as directed.

Cucumber Ribbons

Even an ordinary dish can become company fare if you dress it up by spiraling a few cucumber ribbons the serving plate.

To make cucumber ribbon garnishes:

Place cucumber on cutting board. Cut off ends with paring knife; discard ends. Cut thin lengthwise strips from cucumber with vegetable peeler, making sure there is a line of green peel on both sides of each strip. Continue cutting strips until you reach seeds.

Cut thin strips from cucumber, leaving a line of green peel.
©2006 Publications International, Ltd.
Cut thin strips from cucumber,
leaving a line of green peel.

Turn cucumber, leaving about 1/2 inch of green peel before starting next strip. Repeat cutting of strips. Repeat turning and cutting once more.

If desired, trim edges of cucumber strips to straighten sides. Place strips in ice water to chill thoroughly. Remove from water; drain well.

Gently gather cucumber strips with fingers to form decorative ruffle. Place on desired food or plate to secure.

Gather cucumber ribbon garnishes into decorative ruffles.
©2006 Publications International, Ltd.
Gather into a ruffle.

Garnish as desired.

Garnish with Cucumber Ribbons.
©2006 Publications International, Ltd.
Garnish with Cucumber Ribbons.

Zucchini Flowers

For an elegant plate, accent the center of a fish dish with a zucchini garnish.

To make zucchini flower garnishes:

Place zucchini on its side on cutting board. Cut off both ends with paring knife; discard ends.

Cut off ends of zucchini with paring knife.
©2006 Publications International, Ltd.
Cut off ends of zucchini with paring knife.

Cut thin lengthwise slices from zucchini with vegetable peeler, making sure there is green peel on both side of each strip. Continue cutting slices until you reach seeds.

Peel thin strips, retaining the green lines when making zucchini flower garnishes.
©2006 Publications International, Ltd.
Peel thin strips, retaining the green lines.

Turn zucchini and continue cutting slices, always making sure there is green peel on both sides of each slice. Turn one more time; repeat.

Turn zucchini and continue cutting.
©2006 Publications International, Ltd.
Turn zucchini and continue cutting.

Cut ends off slices with paring knife to make an even edge.

Cut off ends for an even edge.
©2006 Publications International, Ltd.
Cut off ends for an even edge.

Make additional cuts about 1/16 inch apart along one edge of each slice, cutting almost to opposite edge.

Make additional cuts in the zucchini.
©2006 Publications International, Ltd.
Make additional cuts in the zucchini.

Roll up each slice.

Roll up each slice.
©2006 Publications International, Ltd.
Roll up each slice.

Insert small piece of wooden toothpick through each base to secure rolls.

Insert a toothpick to secure rolls when making zucchini flower garnishes.
©2006 Publications International, Ltd.
Insert a toothpick to secure rolls.

Garnish as desired.

Garnish with Zucchini Flowers.
©2006 Publications International, Ltd.
Garnish with Zucchini Flowers.

Variation: Substitute yellow summer squash for zucchini. Continue as directed.

Advertisement

Vegetable Garnishes

Nothing beats a pretty arrangement of fresh garden vegetables. We've already shown you how common salad vegetables can be used as garnishes.

We have some great ideas for some of your other vegetables, from the green ones to the ones that come in bunches.

We'll show you what to do with onions. We can chat about celery garnishes. If you're not a fan of radishes, after you learn how to use them for garnishing, you might agree that they're as good as roses. And, if you're still interested in vegetables, learn how to prepare fruits and vegetables with our easy step-by-step instructions.

Green Onion Curls

No Asian meal is complete without a heaping bowl of rice. Dress ip the bowl with a delicate green onion curl.

To make green onion curl garnishes:

Place green onion on cutting board. Cut off roots with paring knife; discard roots.

Cut onion crosswise into one 3-inch piece, leaving about 1-1/2 inches of both the white onion and green top portions.

When cutting green onion, leave both the white and green top portions.
©2006 Publications International, Ltd.
When cutting green onion, leave both
the white and green top portions.

Make lengthwise cut from white end of onion almost to center of piece; repeat to slice end into thin slivers.

Cut to center of piece.
©2006 Publications International, Ltd.
Cut to center of piece.

Place onion in cold water (not ice water). Let stand 30 seconds or until ends curl slightly. Remove from water; drain well.

Garnish as desired.

Garnish with Green Onion Curl, or Celery Curl, as described below.
©2006 Publications International, Ltd.
Garnish with Green Onion Curl,
or Celery Curl, as described below.

Celery Curls

To make a chilled pasta dish main dish look elegant, serve it on your prettiest salad plates with a celery curl on the side.

To make celery curl garnishes:

Trim ends from celery rib; cut into 3-inch pieces. Cut each piece lengthwise in half.

Make lengthwise cut from end of celery piece almost to center; repeat to slice end into thin slivers.

Slice celery into thin slivers when making celery curl garnishes.
©2006 Publications International, Ltd.
Slice celery into thin slivers.

Place in ice water and refrigerate until ends curl. Remove from water and drain well before serving.

Garnish as desired.

Matchstick/Julienne Carrots

Julienne carrots are cut into very thin four-sided strips, also known as matchsticks.

To make matchstick, or julienne, carrots for garnishing:

Cut a lengthwise strip from carrot so that it can lie flat on cutting board.

Cut a strip so carrot can lie flat when making matchstick carrots.
©2006 Publications International, Ltd.
Cut a strip so carrot can lie flat.

Cut carrot into 2-inch lengths. Place flat side of piece down on cutting board. Cut lengthwise with utility knife into thin slices.

Cut lengthwise.
©2006 Publications International, Ltd.
Cut lengthwise.

Stack a few of the slices. Cut into 1/4-inch-wide strips. Repeat with other slices.

Garnish as desired.

Matchstick/Julienne Turnips

Turnips are another vegetables that can be made into matchsticks.

To make matchstick, or julienne turnips, for garnishing:

Cut turnip lengthwise into quarters.

Place flat side of quarter down on cutting board. Cut lengthwise with utility knife into thin slices.

Cut turnip lengthwise with utility knife.
©2006 Publications International, Ltd.
Cut turnip lengthwise with utility knife.

Stack a few of the slices. Cut into 1/4-inch-wide strips. Repeat with other slices.

Radish Fans

Team a radish fan with some fresh basil leaves; use to trim a chicken main course.

To make radish fan garnishes:

Place radish on cutting board. Cut off top and bottom tip of radish with paring knife; discard.

Cut bottom off radish when making radish fan garnishes.
©2006 Publications International, Ltd.
Cut bottom off radish.

Cut parallel 1/8-inch-thick crosswise slices about three-quarters of the way into radish, making sure not to cut all the way through radish.

Cut parallel slices into the radish. Don't slice all the way through.
©2006 Publications International, Ltd.
Cut parallel slices into the radish.
Don't slice all the way through.

Place radish in ice water. Chill in refrigerator several hours or until radish fans out. Remove; drain well.

Garnish as desired.

Garnish with Radish Fan.
©2006 Publications International, Ltd.
Garnish with Radish Fan.

Radish Rose

Accent a bowl of creamed peas, beans, or asparagus with a radish rose.

To make radish rose garnishes:

Cut off top and bottom tip of radish with paring knife; discard.

Set radish upright on cutting board. Cut a thin vertical slice down one side of radish with knife, cutting about three-fourths of the way into radish.

Cut a thin slice from the radish when making radish rose garnishes.
©2006 Publications International, Ltd.
Cut a thin slice from the radish.

Make three or four additional slices down sides of radish, spacing slices evenly around radish.

Cut a vertical slice into the radish. Don't cut all the way through.
©2006 Publications International, Ltd.
Cut a vertical slice into the radish.
Don't cut all the way through.

If desired, make a second series of cuts about 1/8 inch inside the first set.

Place radish in ice water until it opens slightly. Remove; drain well. Trim with celery leaves, if desired.

Garnish with Radish Roses.
©2006 Publications International, Ltd.
Garnish with Radish Roses.

Vegetable Ties

Bundles of vegetables tied with onion or leek strips are ideal for buffet-serving. Guests can place the bundles on their plates quickly and easily.

To make vegetable tie garnishes:

Bring a large saucepan of water to a boil.

Place several green onion tops (or leek tops) on cutting board. Cut tops lengthwise into 1/4-inch-wide strips with paring knife.

Cut tops lengthwise with a paring knife.
©2006 Publications International, Ltd.
Cut tops lengthwise with a paring knife.

Carefully add strips to boiling water in saucepan.

Add strips to boiling water when making vegetable tie garnishes.
©2006 Publications International, Ltd.
Add strips to boiling water.

Simmer 30 seconds; drain. Place strips in ice water to cool. Remove; drain well. Set aside.

Peel carrots with vegetable peeler; place on cutting board. Cut off ends with utility knife; discard ends. Cut carrots crosswise into 4-inch pieces.

Cut carrots into 4-inch pieces.
©2006 Publications International, Ltd.
Cut carrots into 4-inch pieces.

If desired, cut a thin lengthwise slice from carrot to prevent carrot from rolling as you make additional cuts; discard slice. Place the carrot, cut side down, on cutting board. Cut each piece lengthwise 1/4-inch-thick slices.

Cut carrot lengthwise.
©2006 Publications International, Ltd.
Cut carrot lengthwise.

Cut 1/4-inch-thick slices lengthwise to make thin, julienne sticks.

Cut into julienne sticks.
©2006 Publications International, Ltd.
Cut into julienne sticks.

Carefully add julienne sticks to boiling water in large saucepan. Simmer 1 minute or until crisp-tender; drain well. Add carrot sticks to ice water to cool thoroughly. Remove; drain well.

Add carrot sticks to boiling water.
©2006 Publications International, Ltd.
Add carrot sticks to boiling water.

Cut green onion strips crosswise into 6-inch lengths.

Cut green onions lengthwise into six-inch strips.
©2006 Publications International, Ltd.
Cut lengthwise into six-inch strips.

For each bundle, place green onion strip on cutting board. Place 10 to 15 julienne carrot sticks crosswise on strip. Tie strip securely around sticks.

Tie strip around vegetable sticks when making vegetable tie garnishes.
©2006 Publications International, Ltd.
Tie strip around vegetable sticks.

Garnish as desired.

Garnish with Vegetable Ties.
©2006 Publications International, Ltd.
Garnish with Vegetable Ties.

Variation: Substitute fresh whole green beans for julienne carrot sticks. Prepare beans as directed in step 8 for carrots. Tie with green onion ties as directed.

Advertisement

Fruit Basket Garnishes

Fruits like watermelons and pineapples are delicious to taste, but awkward to carry. They're hard to open, but the fruit inside is always worth the effort.

Try It!
Here are some recipes from our collection to use with garnishes:
    • Layered White Bean and Tuna Dip
    • Shrimp with Peanuts
    • Pineapple Crab Salad
    • Chinese Chicken Salad

    We have some ideas to help you use the entire watermelon or pineapple. Fruit basket garnishes not only look great and add to the atmosphere, but they also can hold a lot of fruit or salad, as well.

    Watermelon Bowl

    A watermelon bowl filled with chicken salad makes an eye-catching centerpiece for an elegant backyard buffet.

    To make a watermelon bowl garnish:
    1. Place watermelon on its side on cutting board. Cut a thin piece off bottom of melon with chef's knife to create flat surface.

      Cut a thin piece of the bottom of watermelon.
      ©2006 Publications International, Ltd.
      Cut a thin piece of the bottom of watermelon.

    2. Cut off top one-third of watermelon; reserve fruit for snacking.

    3. Set watermelon upright on its flat surface. Remove pulp from watermelon using long-handled spoon, leaving shell intact.

      Remove pulp with long-handled spoon.
      ©2006 Publications International, Ltd.
      Remove pulp with long-handled spoon.

    4. To scallop edge of watermelon bowl, place open end of drinking glass against melon so top edge of glass is aligned with top edge of bowl. Draw a pencil line around glass edge to form scallop shape. Repeat around entire edge of watermelon.

      Draw a pencil line around the watermelon using a glass edge.
      ©2006 Publications International, Ltd.
      Draw a pencil line around the
      watermelon using a glass edge.

    5. Carefully cut along pencil lines with utility knife to form scalloped edge; fill bowl as desired.

      Cut along pencil lines to make a watermelon basket garnish.
      ©2006 Publications International, Ltd.
      Cut along pencil lines.

    6. Garnish.

      Garnish watermelon bowl.
      ©2006 Publications International, Ltd.
      Garnish watermelon bowl.

    Watermelon Basket

    Line a watermelon basket with plastic wrap: use to hold muffins or rolls.

    To make a watermelon basket garnish:
    1. Place watermelon on its side on cutting board. Cut a thin piece off bottom of melon with chef's knife to create flat surface. Stand watermelon on the flat surface.

      Cut off a thin piece of melon bottom.
      ©2006 Publications International, Ltd.
      Cut off a thin piece of melon bottom.

    2. To make basket handle, start slightly off center of middle of melon and draw a pencil line crosswise about one-half of the way down side of watermelon. Draw another line parallel to first to form strip about 2 inches wide.

      Draw a line down the side of the watermelon.
      ©2006 Publications International, Ltd.
      Draw a line down the side of the melon.

    3. Turn watermelon around; repeat pencil lines for other half of handle. Draw pencil line horizontally around melon to make guideline for top of basket.

    4. Cut along pencil lines of handle, being careful to cut only to horizontal pencil line indicating top of basket.

      Carefully cut along pencil lines when making a watermelon basket.
      ©2006 Publications International, Ltd.
      Carefully cut along pencil lines.

    5. On one side of handle, cut along pencil line for top of basket, being sure to insert knife into watermelon pulp as far as possible. Carefully remove watermelon as piece is loosened.

      Remove watermelon piece.
      ©2006 Publications International, Ltd.
      Remove watermelon piece.

    6. Set removed fruit aside for snacking or another use. Repeat cutting on other side. Trim away pulp from under handle with utility knife.

      Garnish with Watermelon Basket.
      ©2006 Publications International, Ltd.
      Garnish with Watermelon Basket.

    7. Remove pulp from inside of watermelon with long-handled spoon, leaving shell intact. Fill as desired.

    Pineapple Boats and More

    Pineapple boats give any table a charming tropical feel.

    To make pineapple boat garnishes:
    1. Cut pineapple in half lengthwise through crown.

      Cut pineapple in half when making pineapple boats.
      ©2006 Publications International, Ltd.
      Cut pineapple in half.

    2. Remove fruit from shells with curved knife, leaving shells intact.

      Remove fruit from shell.
      ©2006 Publications International, Ltd.
      Remove fruit from shell.

    3. Remove the core from each pineapple half; discard core.

      Remove core from pineapple when making pineapple boats.
      ©2006 Publications International, Ltd.
      Remove core from pineapple.

    4. Coarsely chop pineapple; place chunks in pineapple boats to serve. Add other fruits, if desired.

      Chop pineapple pieces.
      ©2006 Publications International, Ltd.
      Chop pineapple pieces.

    Similar to pineapple boats, dairy garnishes such as egg chickens, are charming and fun. We'll show you how to make them in the next section.

    Tip!
    Scallop top edge of basket, if desired. Place open end of drinking glass against melon so top edge of glass is aligned with top edge of basket. Draw a pencil line around glass edge to form scallop shape. Repeat around entire watermelon. Carefully cut along pencil lines with utility knife to form scalloped edge.

    Dairy Garnishes

    Dairy garnishes encompass a few different kinds of techniques and ingredients. In this section, we'll talk about how to make butter shapes, how to make egg chickens, and how to pipe cream cheese.

    Try It!
    Here ar e some recipes from our collection to use with garnishes:
    • Josephine's Tea Cakes
    • Mini Neapolitan Ice Cream Cakes

    Butter Shapes

    Top stacks of piping hot pancakes with two or three butter curls.

    To make butter shape garnishes:

    Ingredients:
    Bowl of hot water
    Sticks of butter or margarine, chilled
    Bowl of ice water

    Equipment:
    Butter curler (for butter curls)
    Butter paddles (for butter balls)
    Cutting board
    Paring knife
    Small bowl
    Metal teaspoon
    Waxed paper
    1. For butter curls, place butter curler in hot water. Starting at far end of 1 butter stick, pull curler firmly across the top of the butter. Place finished curl in ice water. Repeat for desired amount of curls, dipping curler into hot water before starting each curl.

      Pull curler across top of butter.
      ©2006 Publications International, Ltd.
      Pull curler across top of butter.

    2. For butter balls, place butter paddles in ice water until cold. Place 1 butter stick on cutting board; cut into 1/2-inch pieces with paring knife.

      Cut butter into 1/2-inch pieces.
      ©2006 Publications International, Ltd.
      Cut butter into 1/2-inch pieces.

    3. Using fingers, shape butter pieces into balls. Chill until firm, if necessary.

      Roll butter pieces into balls.
      ©2006 Publications International, Ltd.
      Roll butter pieces into balls.

    4. Roll each ball between scored sides of paddles, moving paddles in small circles in opposite directions.

      Roll each ball between scored paddles when making butter shapes.
      ©2006 Publications International, Ltd.
      Roll each ball between scored paddles.

    5. For molded butter, allow one butter stick to stand at room temperature. Place candy mold in ice water until cold. Press butter firmly and evenly into mold.

    6. Gently remove molded butter from candy mold using tip of paring knife.

      Place finished butter balls in water.
      ©2006 Publications International, Ltd.
      Remove molded butter with paring knife.

    Hard Cooked Egg Chicken

    Decorate a platter of baked ham with a family of egg chickens.

    To make hard cooked egg chicken garnishes:

    Ingredients:
    red or yellow bell pepper
    ripe olive slice
    hard-cooked egg, shell removed

    Equipment:

    Cutting board
    Paring knife
    1. Place bell pepper on cutting board. Cut lengthwise in half with paring knife. Remove stem, membrane and seeds; discard. Cut one 2 x 1 ½ inch rectangle from each pepper half.

      Cut a rectangle from the bell pepper.
      ©2006 Publications International, Ltd.
      Cut a rectangle from the bell pepper.

    2. For tail, trim both long sides of 1 pepper rectangle at an angle. Make zigzag cuts along wide end of same rectangle.

      Trim rectangle at an angle for tail when making egg chicken garnishes.
      ©2006 Publications International, Ltd.
      Trim rectangle at an angle for tail.

    3. Cut remaining pepper rectangle in half lengthwise. For chicken's comb, cut zigzag edge along 1 long side of 1 rectangle half. If desired, trim comb to make proportional to egg.

      For comb, cut zigzag edge.
      ©2006 Publications International, Ltd.
      For comb, cut zigzag edge.

    4. Cut a small triangle from remaining rectangle half for beak; set aside.

      Cut a small triangle for beak.
      ©2006 Publications International, Ltd.
      Cut a small triangle for beak.

    5. For eyes, cut 2 tiny pieces from olive slice; set aside.

    6. To assemble egg chicken, cut a long thin lengthwise slice from egg with paring knife; discard. Place egg, cut side down, on cutting board.

      Slice egg with paring knife when assembling an egg chicken garnish.
      ©2006 Publications International, Ltd.
      Slice egg with paring knife.

    7. Cut a horizontal slit in wide end of egg. Insert tail, peel side up, into slit. Cut a lengthwise slit in top of narrow end of egg; insert chicken's comb into slit.

      Insert tail peel side up.
      ©2006 Publications International, Ltd.
      Insert tail peel side up.

    8. Cut a hole in front of narrow end of egg; insert beak. Position an olive piece on either side of beak for eyes.

      Cut a hole in front for beak.
      ©2006 Publications International, Ltd.
      Cut a hole in front for beak.

    9. Garnish as desired.

      Garnish with hard cooked egg chicken.
      ©2006 Publications International, Ltd.
      Garnish with hard cooked egg chicken.

    Piped Cream Cheese Garnish

    Squiggle cream cheese over thin slices of smoked salmon on crackers or bagel chips for the perfect accent.

    To make piped cream cheese garnishes:

    Ingredients:
    whipped cream cheese
    fresh dill (optional)

    Equipment:
    large zipper-style plastic food storage bag
    large spoon
    kitchen scissors
    1. Fill plastic bag about 12 full with cream cheese using spoon. Seal bag securely. Cut small piece off bottom corner of bag with kitchen scissors.

      Cut small piece from bottom corner.
      ©2006 Publications International, Ltd.
      Cut small piece from bottom corner.

    2. Position sealed end of bag in your writing hand. Position fingers near opening of bag; place other hand under bag.

    3. For squiggles and lines, hold plastic bag at 45 degree angle about 1/4 inch from surface of food. While gently squeezing bag, guide bag to create desired design. At end of each squiggle or line, stop squeezing bag and lift away from food. Trim with fresh dill weed, if desired.

      Guide bag to create desired design when making cream cheese garnishes.
      ©2006 Publications International, Ltd.
      Guide bag to create desired design.

    4. For puffs and dollops, hold plastic bag at a 90 degree angle. Position opening just above food and gently squeeze, lifting bag slightly while squeezing. When puff or dollop is desired size, stop squeezing and lift up bag. Trim with fresh dill, if desired.

      Gently squeeze bag to create cream cheese puff.
      ©2006 Publications International, Ltd.
      Gently squeeze bag to create cream cheese puff.

    In the final section, learn how to make another breakfast favorite, bacon, into beautiful garnishes.

    Bacon Garnishes

    Dress up wedges of quiche with bacon curls. You can use a cluster of bacon curls to decorate the top of a tossed salad, or even a baked casserole.

    Try It!
    Here are some recipes from our collection to use with garnishes:
    • Easy Corn Chowder
    • Roast Herbed Sweet Potatoes with Bacon & Onions
    • Baked Chicken with Bacon-Tomato Sauce
    • Tailgate Potato Salad
    • Red Cabbages and Apples

    Bacon Curls

    For a quick appetizer of snack, spread crackers, melba rounds or party rye bread slices with your favorite cheese. Top each with a bacon curl.

    To make bacon curls:

    Ingredients:
    Bacon slices, each bacon slice makes 3 bacon curls

    Equipment:
    Cutting board
    Parking knife
    6 to 8 inch metal skewers
    broiler pan
    fork
    paper towels
    1. Place bacon slices on cutting board. Cut each slice crosswise into 3 pieces with a paring knife.

      Cut each slice in three places.
      ©2006 Publications International, Ltd.
      Cut each slice in three places.

    2. Loosely roll up bacon pieces; thread about 1/2 inch apart on metal skewers.

      Thread rolled-up bacon pieces onto skewers.
      ©2006 Publications International, Ltd.
      Thread rolled-up bacon pieces onto skewers.

    3. Place skewers, 1-1/2 to 2 inches apart, on unheated rack of broiler pan. Position under preheated broiler so rack is apart 5 inches from heat source. Broil 4 o 6 minutes or until bacon is crisp, turning every 2 minutes. Cool. Carefully remove curls from skewers with fork. Drain on paper towels; cool completely.

      Garnish as desired with bacon curls.
      ©2006 Publications International, Ltd.
      Garnish as desired with bacon curls.

    Everything is beautiful, as goes the old saying. With the different garnishes you now know, you can turn any food presentation from ordinary to awesome.

    © Publications International, Ltd.

    Advertisement

    Loading...