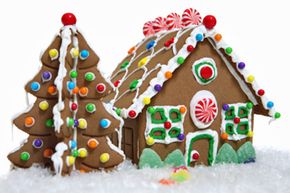
Gingerbread is a mildly sweet and slightly spicy cookie usually associated with the holidays. Ginger, cinnamon, cloves and molasses are what give this sweet treat its unique flavor. And the fact that it hardens to the consistency of a graham cracker makes it ideal for crafty projects for the family, like building a gingerbread house. Here's how to create a gingerbread house that Hansel and Gretel will never want to leave.
Cut the Shapes
Advertisement
Before you don your oven mitts, you'll want to design your gingerbread house and cut patterns for the different pieces out of paper or cardboard. The basic pieces for a gingerbread house are the front, back, sides, chimney and roof. Beyond that, the sky is the limit for the design of your house. If you're feeling particularly architectural, you can always add details like turrets or dormers, or replicate the "Gone with the Wind" mansion, Tara, by adding columns and a traditional Southern wrap-around porch. Its best if the dough sits at least overnight before you bake, and it can be made up to three days ahead of time. You'll want to roll out the dough to about 1/4-inch thick to ensure that it will be structurally sound. Put the pattern pieces over the dough, and cut carefully with a sharp knife. If you want to cut out a door and windows, you can do this now or wait until the gingerbread comes out of the oven while it's still warm.
Assemble the Parts
Royal icing, which is also used to decorate fancy cakes, is the glue that holds the house together. A simple recipe for royal icing is two large egg whites and three cups of powdered sugar. Slowly beat the powdered sugar into the egg whites until you get stiff peaks. To keep the icing from drying out while you work, you can keep a damp towel over the top of the bowl. Royal icing is best applied with a pastry bag, and if you don't have one at home, you can fashion one out of a plastic sandwich bag with the corner cut off.
Four hands are better than two when you finally start the assembly, because the pieces need to be held together until the icing dries. If you plan to go solo, you might want to grab a can or something sturdy to help prop the pieces up until they dry. You can use a cookie sheet or a very sturdy piece of cardboard as a base. And if you plan to eat your handiwork, you'll want to line the base with waxed paper. The first step is to assemble the base of the house. To do this, just pipe a thin line of royal icing along the edge of one of the sides, and attach it to the front piece. Once the pieces are joined, you can pipe more icing into the seams for a firm bond, and it's wise to join the house to the cardboard as well. Once the base of the house has been raised, let it sit for about an hour to provide a stable structure for the roof to rest on. If a piece happens to break, there's no need to fret. As long as it's not in crumbs, you should be able to fix it with royal icing. If the house is for décor and not dessert, you can even attach a piece of cardboard with royal icing to serve as a splint and help fortify the break. Some cleverly placed decorations will easily cover up the seam.
Decorate
Now comes the really fun part -- decorating your gingerbread house. Since, technically, the house is supposed to be edible, most people tend to use candy. Gumdrops are popular for lining roofs and also make a colorful row of shrubs to sit out front. Candy canes make beautifully arched doors and windows, wafer cookies are great colorful roof tiles and red hots are great for detail work. The only limit is your imagination. Royal icing can be used to attach the candies, or piped on its own to add graphic details.
Advertisement
