How to Make Cheese

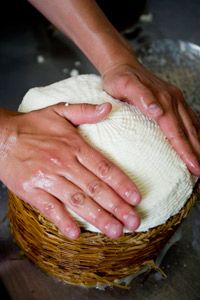
A cheese maker presses the salted curds in a basket to remove any excess whey.
A cheese maker presses the salted curds in a basket to remo­ve any excess whey.
iStockphoto.com/seraficus

­When you buy milk at the grocery store, you probably look pretty carefully at the expiration date. It's not that it might be bad; it's that you need to make sure you can finish it all before then. But what if you could just buy a whole gallon and not worry about drinking it all in a week? Making your own cheese means never having to throw out milk again. It means turning all that healthy dairy goodness into a yummy, preserved-milk treat.

Cheese is essentially fermented milk, and fermentation makes milk last a whole lot longer. Certain heat-resistant bacteria produce acid when milk is heated, and this acid prevents harmful bacteria from growing. Instead of the milk lasting about a week, cheese lasts months to years. That's how cheese making evolved thousands of years ago, most likely by accident in especially hot climates when milk simply got so warm it congealed into yogurt, and then aged into cheese. Animals like cows and goats only produced milk during certain times of the year. When it turned out the congealed milk didn't hurt anyone, cheese making became a way of preserving extra milk so people could consume it all year long. That cheese tastes great was just a side benefit.

Advertisement

­It's not that difficult to get in on the benefits of cheese making, although it can take practice. Luckily, you­ don't need to make a big investment in supplies to make cheese at home, so you can probably afford the learning process. The most complex piece of equipment you'll need is the cheese press, but you can make one out of stuff you have at home if you don't want to buy one.

In this article, we'll walk through the process of making a basic hard cheese. The process we'll use is adapted from lessons published by University of Cincinnatti biochemistry professor David Fankhauser.

Let's start by gathering supplies and ingredients and preparing the milk.

Advertisement
Getting Started -- Cheese Making Equipment and Ingredients

Cheese
It only takes basic equipment and ingredients to produce a simple wheel of cheese.
Larry Crowe/Associated Press

­We're going to create 1 pound (0.45 kilograms) of hard cheese, much like a Colby or a mild white cheddar (actually, all cheese is white -- orange and yellow cheeses have color added). Simply stated, we're going to warm the milk, add an enzyme called rennet (an enzyme either from the stomach of a cow or goat or, for vegetarian cheeses, from mold), and press the resulting milk goo into a block.

Here's what you need to begin:

Advertisement

Equipment

*Sterilize with boiling water

  • Plastic or metal mixing spoon*
  • Thermometer*: Should be able to read temperatures up to at least 225 degrees F (107 degrees C)
  • Strainer
  • Large bowl
  • 4-6 quart stainless steel pot and lid*: Aluminum won't deal well with the acid ­in the cheese
  • Cheese cloth*: Available at a cheese supply store, or use a handkerchief or old pillowcase
  • Simple cheese press: Available at a cheese-making supply store; the super handy can attempt this complex homemade version; or make a simple press from a large can, with ends removed, about 5 inches (13 centimeters) tall and 4 inches (10 centimeters) in diameter, one end of the can, a rubber band and a mason jar.

Ingredients

  • One gallon whole milk
  • 3 teaspoons buttermilk or 1/3 cup plain yogurt (this is the starter with the active bacteria that will ferment the milk)
  • 1/4 tablet rennet: Find this at a cheese supply store or a natural grocer
  • Salt (non-iodized)

Once you've got all of this within reach, you're ready to make some cheese. The first step is an easy (and sort of counterintuitive) one: Let the milk sit out.

1. Inoculate and incubate: Pour the gallon of milk into the sterilized pot. Warm on the stove to 68 degrees F (20 degrees C). Stir in buttermilk or yogurt starter. Blend well and cover. Remove from heat. Let sit for an hour (or up to several hours).

2. Warm: Return the pot to the stove. Warm milk to 86 degrees F (30 degrees C) and keep it there.

3. Coagulate: Dissolve 1/4 tablet of the rennet in 1/4 cup cold water. Add the diluted rennet to the warmed milk and stir well, about 30 seconds. Let sit undisturbed for one hour (don't move it around), keeping the temperature at 86 degrees F.

After the hour is up, it's time to go in and see if your milk is ready to work with.

Advertisement

Making a Break: Separating the Cheese

Your pot full of milk should now be coagulated enough to cut into cubes. You'll ­     ­  know if it's ready if you get a clean break.

4. Break: Stick your finger into the curd (gelled milk). When you pull your finger out, the curd should break cleanly over it, leaving a crevice where your finger was. If it's too liquidy to break, let it sit undisturbed for another hour and try again.

Advertisement

5. Cut: Once it breaks cleanly, cutthe curd. Insert a long knife into the pot (it should touch the bottom) and cut a grid of 0.5-inch (1.25-centimeter) cubes. Let the cubes sit for several minutes.

6. Set: While slowly warming the curd to 98 degrees F (37 degrees C), use your hand to stir up the pot. Dig all the way down to the bottom, lift and mix gently. Don't squeeze, just stir. Keep stirring until the temperature reaches 98 degrees F and the curd is set to the consistency of scrambled eggs. Remove the pot from the heat.

7. Separate: The curd should have sunk to the bottom of the pan, topped by whey. (If it hasn't, you could have a problem with contamination. See Basic Cheese Making to learn more.) Pour off some whey, and put the curds in a strainer to remove the rest of the whey. Pour the curds into a bowl.

8. Salt: Add 2 teaspoons of salt (remember, non-iodized -- iodine will turn your cheese green) and mix with your hands. Again, pour off any whey that floats to the top.

Your salted curd mixture is now ready to become full-fledged cheese. This happens when you press it.

­

Advertisement

Finding a Cure: Pressing and Aging the Cheese

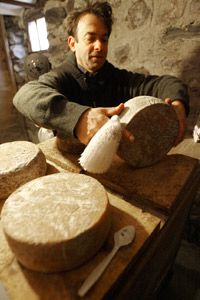
The author Brad Kessler checks his homemade goat cheese in Vermont.
Toby Talbot/Associated Press

­It's time to pull out your store-bought or fancy homemade cheese press, or assemble your super simple one (which will work fine for our purposes here).

9. Press: Assemble your cheese press by inserting the cleaned can into the stainless steel pot and forming a bag inside the can with the sterilized handkerchief. Then pour the salted curd into the cloth-lined can, and fold the tips of the cloth over the curd. Place one end of the can on top and press down. Place the heavy jar on top of the press. Secure jar with a rubber band -- the band should wrap around the entire contraption, running from the top of the jar around to the bottom of the pot. Let the press sit this way for about 12 hours.

Advertisement

10. Cure: Remove the pressed curd fro­m the can and unwrap it. Salt all outside surfaces and rewrap with a fresh cloth. Refrigerate, replacing wrap daily, for one to two weeks or until a rind forms and the cheese is dry to the touch. You now have yourself a block of real homemade cheese.

If you'll be making some grilled cheese sandwiches or cheese sauce that'll use up your block in a few days, you're all done. But if you want to age your cheese for months, then you need to wax it. You can find cheese making wax at any cheese supply store. You just melt the wax and dip in the cheese. The wax dries to form a shell. You can re-melt the wax and use it over and over.

What you've got now is a basic cheese, made with very basic equipment. But this is pretty much the process you use to make almost any cheese out there. It's all a matter of varying things like milk type, temperatures, amount of stirring, and sitting and curing time. For instance, you'd use goat's milk for goat cheese or skim milk for light cheese. You wouldn't cure cottage cheese at all, while you could cure Swiss cheese for several years to make it extra sharp. You'll find lots of cheese recipes on the next page in case you'd like to try a sharp Swiss, a Gouda, a feta or some nice, soft brie.

For more information on cheese making and related topics, look over the links on the next page.

Advertisement

Lots More Information

Related HowStuffWorks Articles

  • Fankhauser, David B., Ph.D. "Basic Cheese Making." University of Cincinnati Clermont College.http://biology.clc.uc.edu/Fankhauser/Cheese/Cheese98.htm
  • Fankhauser, David B., Ph.D. "Cheese Press Materials." University of Cincinnati Clermont College.http://biology.clc.uc.edu/fankhauser/Cheese/Cheese_5_gallons/Cheese_press/PRESS_SETUP_00.htm
  • "History of Cheese." History for Kids.http://www.historyforkids.org/learn/economy/cheese.htm
  • "Rennet FAQ." New England Cheesemaking Supply.http://www.cheesemaking.com/store/pg/106.html
  • Toth, Mary Jane. "Making Cheese at Home." Countryside Magazine.http://www.i4at.org/countrylife/cheese.html

Advertisement

Loading...