Making Bread Dough
OK. You know you want to make bread. You know that it involves yeast. But the big question: What is yeast? And, what does it have to do with dough? Bread contains yeast as a leavening agent. It's what causes the dough to rise and what gives the bread shape, volume and texture. The most common type of yeast used in bread making is active dry yeast. Each package contains thousands of microscopic living plants that are activated by warm liquid and fed by sugar and starch. When activated, live yeast releases carbon dioxide gas bubbles. When these bubbles become entrapped in the dough, it rises.
Step 1: Proofing the Yeast
But before you can make bread dough, you have to proof the yeast. Proofing the yeast makes certain that the yeast is still alive and active before it goes in the dough recipe. Yeast that is not alive won't make bread rise.
Advertisement
To proof the yeast for baking bread:
- Check the expiration date on the yeast package. Replace if necessary.
- Heat the liquid to 105-115 degrees Fahrenheit. Use an instant-read thermometer to determine if the liquid has reached the proper temperature. If the dissolving liquid is too cold, the yeast action is retarded. If the liquid is too hot, it kills the yeast.
- Measure out the specified amount of warm liquid and pour it into a small bowl.
- Sprinkle the specified amounts of yeast and sugar over the warm water; stir until the yeast is dissolved.
- Let stand 5 minutes or until the mixture is bubbly, indicating the yeast is alive and releasing gas bubbles.
- If the yeast does not bubble, discard the mixture and start again with new ingredients.
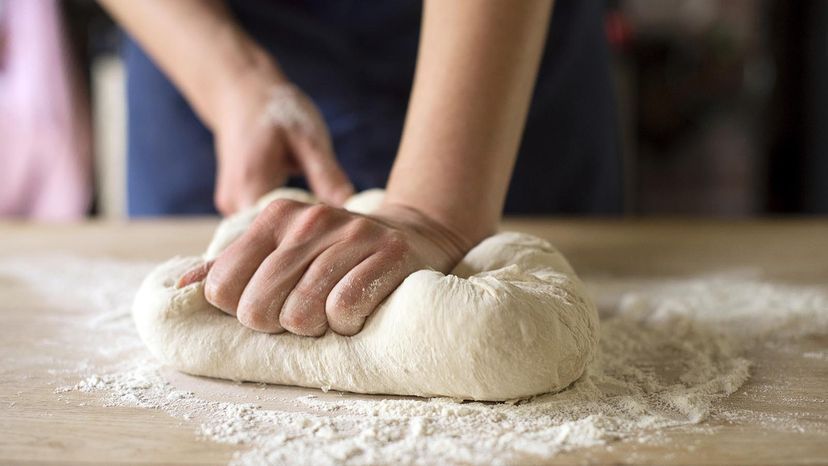
Step 2: Kneading the Dough
Once the ingredients have been combined in the mixing bowl, most yeast dough needs to be kneaded. Kneading develops and strengthens the gluten, a protein in flour that gives the bread its structure. Gluten forms an elastic network that traps the carbon dioxide gas released by the yeast. Kneading also incorporates and homogenizes the ingredients and gradually makes the dough smoother and more elastic.
Bread dough can be kneaded using an electric mixer with a dough hook attachment or a food processor. These methods work well for stickier, batter-type dough that is difficult to knead by hand, such as sweet yeast breads that contain more sweeteners and fat. Follow the manufacturer's instructions.
To knead dough by hand for baking bread:
- Lightly sprinkle flour on the kneading surface and your hands to make the dough easier to handle.
- Flatten the dough slightly and fold it in half toward you.
- Push the dough away from you with the heels of your hands in a rolling motion.
- Rotate the dough one-quarter turn and repeat the folding, pushing and turning steps for the length of time specified in the recipe.

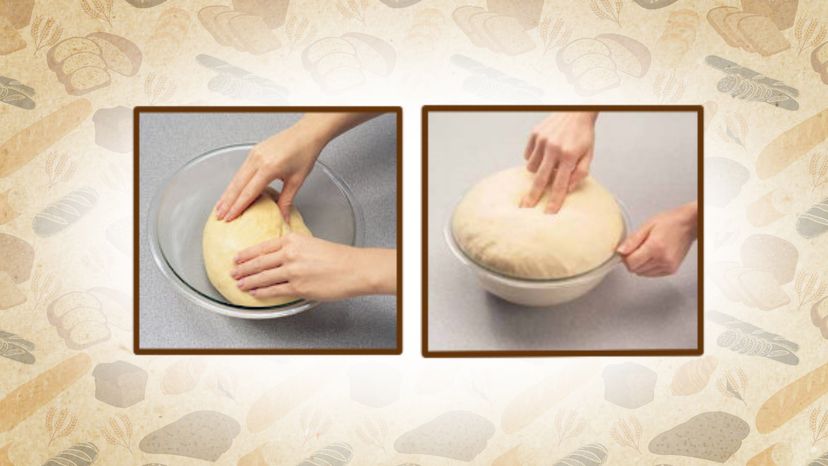
Step 3: Letting the Dough Rise
Now that all the ingredients are thoroughly combined, the yeast needs time to do its work. Letting the dough rise allows time for the yeast cells to give off carbon dioxide gas. The process gradually expands and develops the dough in flavor, texture and structure. To allow the dough to rise for baking bread:
- Place the dough in a large greased bowl and turn it over so all surfaces are greased. This prevents the dough from drying out or developing a crust. (Leave stickier, batter-type yeast dough to rise in the mixing bowl.)
- Cover the dough with a clean kitchen towel and set in a warm place (80-85 degrees Fahrenheit) away from drafts.
- Let the dough rise until it has doubled or almost doubled in bulk. Use the time guidelines given in the recipe.
- To test if the dough has risen enough, lightly press two fingertips about one-half inch into the dough. The dough is ready if the indentations remain when your fingertips are removed.
Alternative method to allow the dough to rise for baking bread: Letting dough rise in a colder environment slows the process, offering the convenience of beginning a recipe one day and completing it later that day or the next. For the refrigerator rising method, cover the dough with greased plastic wrap and set it in the refrigerator for 3 to 24 hours. Bring the dough to room temperature before shaping or baking.
Once the dough has doubled, it needs to be punched down. The next section tells you how to do just that.