Kitchen Appliance Tips

Learning some helpful kitchen appliance tips will help you create delicious meals.
Matthew Moore

Whether you cook on a regular basis, only on the weekends, or only for special occasions, having certain kitchen appliances on hand makes your job much easier.

The following kitchen appliance tips will help guide you in choosing which appliances to purchase, how to purchase them, and how to use them in order to create wonderful dishes.

Advertisement

How to Use a Pressure Cooker

Many people are intimidated by pressure cookers, mostly because of the extremely high temperatures involved. Learn more about modern pressure cookers, and follow these helpful tips on how to use a pressure cooker with ease.

How to Use an Ice Cream Maker

Everybody loves ice cream, but not too many people make it at home. Learn how to use an ice cream maker so that you can create your own tasty treats at home.

How to Use a Food Processor

Food processors allow you to prepare meals in a fraction of the time it would usually take. Check out this page to learn more about all the different sizes available and how to use them.

How to Use a Roasting Pan

Not all roasting pans are created equal. This page will help you decide what type, shape, and size roasting pan is best for the type of cooking you will be doing.

How to Use a Blender

If there's one kitchen appliance that every household should have, a blender is the one. This whizzing and buzzing gadget quickly blends, chops, purées, and liquifies.

How to Use a Bread Maker

There's nothing like the smell and taste of freshly baked bread. Learn more about the different types, features, and how to choose the perfect bread maker for your home.

How to Use a Waffle Iron

Waffles are a delicious treat any time of the day. This page will teach you how to pick and care for a waffle iron and how to make perfect waffles.

How to Use a Stand Mixer

The stand mixer is one of the most helpful and easy-to-use kitchen appliances. Check out this page to learn how to choose and operate a stand mixer.

How to Use a Cookie Press

Cookie presses are fun to use anytime of the year, but especially around the holidays. Follow these helpful tips on how to use a cookie press to create fabulous treats.

Continue on to the next page to learn tips on how to use a pressure cooker -- one of the most feared kitchen appliances.

For more helpful kitchen appliance tips and recipes, see:

How to Use a Pressure Cooker

Modern pressure cookers are equipped with safety features to prevent accidents.
U.S. Consumer Product Safety Commission

Q. My mother-in-law recently gave me her pressure cooker, but I've heard so many horror stories about them that I'm afraid to use it. Are pressure cookers safe?

A. Pressure cookers are special pots with airtight, locking lids that feature a valve system that regulates internal pressure. Steam that builds up inside the pot cooks the food at a very high temperature. This ability to cook at extremely high temperatures means foods that take hours -- such as dried beans -- can cook in a fraction of the time, and "regular" meals can be on the table in minutes.

Although we've all heard the urban legends about exploding pressure cookers, modern pressure cookers are equipped with safety features to prevent such mishaps. These include lids that must be locked into place before pressure will rise, an expanding rubber gasket that prevents you from removing the lid until the pressure has been released to safe levels, and a safety valve that automatically reduces the pressure should there be a malfunction or in the event that you forget to turn down the heat when high pressure is reached.

Advertisement

The next page offers tips on how to use an ice cream maker. Keep reading to find out how to make yummy, homemade ice cream in your own kitchen.

For more helpful kitchen appliance tips and recipes, see:

How to Use an Ice Cream Maker

There are two basic types of ice cream makers available on the market -- manual and electric.
Ehsan Namavar

Q. I love ice cream and would like to buy an ice cream maker to have in my home kitchen, but I don't have a lot of space. Are ice cream makers still as bulky as I remember? Also, are there electric ice cream makers available, or are they all manual?

A. Making ice cream at home conjures a picture of a 1950s, Mayberry era when everyone took a turn cranking a machine that looked like a wooden bucket with a handle sticking out of it. Those rudimentary ice cream makers are still around and can be fun in a retro way, but most of us are looking for something a little less aerobic-intensive.

Today, ice cream makers for the home kitchen come in two basic types: manual and electric. They can be as simple as the Mayberry bucket, or they can have bells and whistles that do everything for you. Prices range from less than $50 on up, depending on how many bells and whistles you want.

Advertisement

All work on about the same principle: A paddle, called a dasher, fits inside a canister that holds the ice cream mixture. The canister fits inside a container that holds the freezing agent: ice and salt, an electric refrigerating unit, or a chemical coolant that's sealed inside the container walls. (This is sometimes called a "freezer bowl" and requires 24 to 48 hours in your freezer before it is cold enough to make ice cream.) The dasher stirs the ice cream mixture as it freezes to keep it smooth and aerated -- without air, ice cream would be brick-solid -- and to keep ice crystals from forming and ruining the taste and texture.

Manual machines require people-power to keep the dasher turning. Some require ice and rock salt, which lowers the temperature of the ice, in the container that holds the canister; these machines need to be cranked manually for 30 to 40 minutes to make four to six quarts of ice cream. The type with freezer bowls only needs to be cranked once every two or three minutes for 15 to 30 minutes.

The most common electric ice cream maker uses ice and table salt to line the canister, and the motor turns the canister. Larger units have electric freezer units and automatic dashers, so you just pour in the ice cream mixture and turn it on.

One popular stand mixer brand has an ice cream maker attachment: a rotating dasher, and insulated freezer bowl that can make two quarts of ice cream in about 20 to 30 minutes.

No ice, no rock salt, no aerobic crank­ing…it looks like Mayberry has entered the 21st century.

One of the most popular small kitchen appliances, the food processor, is discussed on the next page. Keep reading to find out how to use a food processor.

For more helpful kitchen appliance tips and recipes, see:

How to Use a Food Processor

Use a food processor to easily grate, chop, slice, and more.
Natalia Bratslavsky

Q. Do food processors typically come with a variety of blades, or do I have to purchase the blades separately?

The food processor is the perfect kitchen tool for grating cheeses, chopping herbs, slicing vegetables, and even making bread dough.

Food processors are available in a few different sizes and come with a variety of attachments. The most common attachments are a very sharp metal blade used for chopping and pureeing; metal slicing disks; metal shredding disks; and a plastic dough blade used for mixing and kneading dough.

Advertisement

Q. What should I consider when shopping for a food processor?

A. When purchasing a food processor, consider the types and amounts of food you will be processing. If you intend to knead heavy or stiff bread doughs, or crush ice often, you will need a processor with a heavy-duty motor.

Q. Is a food processor difficult to operate?

A. No, food processors are actually easy-to-use appliances. The switch on a food processor has an "On" setting and a "Pulse" setting. Turning the switch to the "On" position will turn the processor on and keep it running until you turn it off. The "Pulse" setting, however, will keep the processor running only as long as you hold the switch in position. Using an on/off pulsing action results in more even chopping of light foods, such as fresh herbs or garlic, because it allows the food to fall back onto the blade. It is also helpful when processing foods that can liquefy if processed too long, such as celery and onions.

Q. Are food processors easy to clean?

A. Yes, food processors are easy to clean, if you follow these tips. To clean the metal blade or metal disks, it is best to wash them carefully by hand. A few trips through the dishwasher can dull their sharp cutting edges. For easy cleanup of sticky foods, such as cheese, spray the blade or shredding disk with nonstick cooking spray before using.

When preparing a turkey or roast, using the correct size and shape roasting pan is very important. Check out the next page to find out tips on how to choose and use the correct pan for your meal.

For more helpful kitchen appliance tips and recipes, see:

How to Use a Roasting Pan

Measure the inside of your oven before you purchase any roasting pan.
R/F cd2

Q. I am hosting my family's Thanksgiving dinner this year, and I need help in choosing a roasting pan. Can you give me tips on how to choose the correct roasting pan to use?

A. Choosing the right pan for your turkey (or roast) is important. The following are tips on how to choose and use different roasting pans.

  • Choose a pan with sides that are about 3 inches high. If the sides are higher, the hot air may not be able to get to the bottom of the pan to cook the food evenly. If the sides are too low, the drippings can spill when pulling the pan out of the oven.
  • If you make gravy with the pan drippings, be sure to get a pan that can stand up to the direct heat of a burner. Besides aluminum pans, stainless steel pans are also suitable for stove-top cooking. However, using an aluminum or stainless steel pan with a nonstick coating won't give you the crispy browned bits on the bottom of the pan that help to make a rich gravy.
  • Most importantly, before you purchase any roasting pan, measure the inside of your oven. Not all ovens are the same size and some will not accommodate larger roasting pans. Pans should have 2 inches of air space on all sides when in the oven to allow good air circulation.
  • If you plan to use your roasting pan for a variety of cooking needs, not just for the occasional roast, consider investing in a good quality roasting pan that will cook with you throughout the years. It may cost a little more, but it will be well worth the price.
  • The pan needs to be just large enough to hold the biggest thing you will roast without touching the sides of the pan. A larger pan will only be cumbersome and difficult to handle.
  • Choose a pan that is heavy and won't buckle under the weight of a large turkey or large cut of meat. Be careful not to choose a pan that is heavier than you can lift once the food is in it.
  • Strong handles are very important. Lifting a hot, heavy pan is much easier with sturdy, fixed handles.
  • Consider the shape of the pan. Oval pans are perfect for cooking a single roast or turkey, but it is more difficult to use them for two smaller roasts or chickens. Rectangular pans with rounded corners, however, can accommodate a wider range of food sizes than oval pans.

The blender is one of the most versatile small kitchen appliances that you could own. Continue to the next page to find out how to choose and use a blender.

Advertisement

For more helpful kitchen appliance tips and recipes, see:

How to Use a Blender

Blender containers come in plastic, glass, and stainless steel.
Peter Rol

Q. I just received a blender for a wedding shower gift. Can you give me tips on how to use it and what I can prepare with it?

A. Blend, purée, liquify, and chop; those are just a few of the tasks the incredible blender can accomplish flawlessly. What would life be like without the musical whizzing and buzzing of your kitchen blender?

Your blender chops food and ice and blends liquids and solids together like a whirlwind. But that's not all! Blenders are best used to add air into a mixture such as a frothy drink. Depending on the size of your blender, it can process up to four cups of liquid -- including soups, sauces, and drinks.

Advertisement

Q. How do I choose the right blender?

A. When buying a new blender, look for one with a container that suits your cooking needs. The container can be made out of plastic, glass, or stainless steel and usually has a plastic lid.

Plastic containers are less expensive, do not break easily, and are not sensitive to changes in food temperatures. However, if you wash a plastic container in the dishwasher, it can scratch over time.

Glass containers are slightly more expensive, may break easily, and can be sensitive to changes in temperatures. Glass containers are much less likely to scratch in the dishwasher.

Stainless steel containers are perfect for blending frozen drinks. But the fact that they're steel means they're not transparent, so to see what's inside you have to stop the blender and remove the lid.

With some blenders, the container must be placed perfectly into the base or the motor will not start. When using a blender, never remove the lid from the container or the container from the base while the motor is running!

Q. What are some quick tips you can give me about using my blender?

A. Here are some basic blender tips you should keep in mind:

  • Place the lid firmly on the container before starting the motor, and place your hand on the container lid while the motor is running.
  • If the motor seems to be struggling at a low speed, add a little liquid and increase to the next higher speed to finish processing.
  • Always turn off the blender and allow the blade to completely stop before removing the lid and the container.
  • When making drinks that use carbonated beverages, prepare the recipe using all but the carbonated ingredient. Pour the blended drink into serving glasses then add the carbonated ingredient last.
  • Try chilling the container before making cold recipes. Glass and metal containers can be chilled in the freezer and will remain cold when blending frozen drinks. This won't work for plastic containers.
  • When blending hot liquid, leave the feeder cap open to release the steam. Start at the lowest speed and gradually increase to higher speeds.
  • Be sure to add at least one cup of liquid to the container when chopping ice cubes.
  • Use your blender to grate harder cheeses such as Cheddar or Swiss. Cut the cheese into cubes then refrigerate before adding to the blender. Add cheese cubes through the feeder cap while the motor is running.
  • Make bread crumbs with your blender. Use stale bread for dry bread crumbs and fresh bread for soft bread crumbs. Add pieces through the feeder cap while the motor is running.
  • Use your blender to grate fresh coconut, grind poppy seeds, reconstitute dry milk and frozen fruit juices, dissolve gelatin, and prepare instant puddings and shakes.
  • Your blender can grind coffee beans, whole spices, crackers or nuts, and make nut butters.

Who doesn't love the smell and taste of freshly baked bread? Continue to the next page to find out how to choose and use a bread maker.

For more helpful kitchen appliance tips and recipes, see:

How to Use a Bread Maker

Be sure to find out the maximum size loaf the bread maker will make.
Ajay ­Singh

Q. I'm new to baking my own bread. Does it matter in what order I add the ingredients to the bread maker?

A. For best results with a bread maker, always follow the manufacturer's instructions for the proper order of adding ingredients.

When adding ingredients like cheese, vegetables, raisins, and nuts, be sure to add them after the first kneading cycle. This will help prevent them from being broken up or crushed during kneading.

Advertisement

Q. I'm thinking of buying some small kitchen appliances for my new house. What are some things I should consider before I purchase a bread maker?

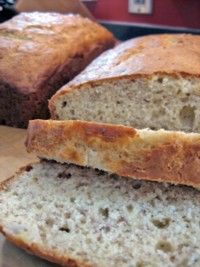
A. Do you love the aroma of baking bread? Do you miss the taste of freshly made bread? Would you bake bread if you had more time? If you answered yes to just one of these questions, you may be a candidate for a bread maker. Although bread making machines have been available for over a decade, only in the last few years have the choices been so many and the prices reasonable.

Q. What exactly does a bread maker do?

A. A bread maker is an electric appliance that mixes bread ingredients, kneads and proofs the dough, then bakes it. All you have to do is measure the ingredients and place them in the bread maker pan, then push a button or two.

Q. What should I look for when shopping for a bread maker?

A. All bread makers make good bread, so selecting the model for you means finding the one that has the most useful features for the amount you want to spend.

A potential buyer needs to know the maximum size loaf a bread maker will make. Typical loaf sizes are 1, 11/2, 2, and 3 pounds. A 11/2- or 2 -pound loaf is best for most consumers.

Even if you live alone and know that a 1-pound loaf will be just right for your everyday needs, it won't stretch very far if you're entertaining. The larger bread makers will always make a smaller loaf, but the reverse is not true. Most bread makers turn out oddly shaped loaves -- tall, round, or square. Some will make a more traditional rectangular loaf. If shape is important to you, factor this into your decision.

Q. What features are most important when choosing a bread maker?

A. The following features should be considered when shopping for a bread maker.

Dough Cycle: A dough cycle allows you to remove the dough from the bread maker after proofing and shape it by hand. This is important if you want to make pizza crusts, shaped savory or sweet breads, or rolls.

Delayed Bake Time: This allows you to select a start time of your choosing so bread can be baking while you're sleeping or away from home.

Crust Color Selector: A color selector gives you a choice of crust color.

Preheat Cycle: This cycle warms ingredients to room temperature so you don't have to.

Rapid Bake: A rapid bake cycle accelerates the bread making process. Look carefully; you may find that one machine's basic bake time is faster than the rapid bake cycle of another.

Viewing Window: A window on the bread machine lets you check dough texture or baking color. This may be important at first but baking is usually consistent from use to use, so once you've determined the correct ingredient amounts for your machine and correct crust color, checking may not be necessary. Remember that you can always open the lid to check loaf texture and color.

Power Saver: If power goes out or unit is unplugged, a unit with a power saver feature will resume its cycle if restarted within a few minutes. A good feature if electrical service in your area is often interrupted.

Yeast Dispenser: This feature is a necessary feature if you choose a delayed bake time feature. Yeast is kept dry and added to liquid at the correct time to avoid overproofing.

Cool Down or Keep Warm Cycle: The cool down feature (usually about 30 minutes long) partially cools the bread and removes excess moisture from the machine so the loaf does not get soggy if you don't remove it immediately. Some machines have a keep warm cycle instead that keeps bread hot for a time.

Programmable Cycle: Consider this feature if you plan to bake any of the following bread types:

  • Raisin and Nut Cycle signals when to add extra ingredients like nuts, raisins, and other dried fruits. It prevents these ingredients from breaking up during mixing and kneading.
  • Whole Wheat Cycle is important if you plan to regularly make heavier whole wheat or whole-grain breads.
  • French Bread Cycle produces a typical French bread with crisp crust and chewy interior by minimizing kneading and increasing proofing.
  • Sweet Bread Cycle adjusts proofing time, baking time, and temperature for an ideal loaf. It prevents overbrowning that is more likely with sweetened breads with higher fat contents.
  • Some bread machines also allow you to make cakes, quick breads, and jam.

For anyone who likes waffles, a waffle iron is a must-have kitchen appliance. Continue to the next page to find out how to choose and use a waffle iron.

For more helpful kitchen appliance tips and recipes, see:

How to Use a Waffle Iron

Every waffle maker has a signal to let you know when the waffle is done.
Steve Woods

Q. I like waffles for breakfast, but I always prepare the frozen type when at home. I would like to purchase a waffle iron, but they seem to be messy. Are waffle irons as messy as they seem?

A. No, waffle irons are not messy. Actually, when using a waffle iron, fresh, steaming-hot homemade waffles are simple to make and so delicious too. In no time you can have a plate heaping with crispy waffles awaiting the topping of your choice.

Q. Can I use my waffle iron to make waffles for more than just breakfast dishes? Can you give me other ideas for lunch and dinner?

A. Waffles are perfect for breakfast, of course -- but also try them for lunch, dinner, and even dessert. Everyone loves butter and syrup toppings, but how about adding your favorite fresh fruit to your morning waffles?

Advertisement

Top those lunch or dinner waffles with anything you like -- tuna salad -- to make a quick and hearty meal. And who can resist ice cream and chocolate syrup on top of waffles for a grand finale?

Q. Are waffle irons available in different shapes and sizes?

A. Waffle irons come in different sizes and shapes but all work just about the same. The magic of the waffle iron is that it takes a basic batter and turns it into a crispy and puffy treat perfect for everyone's tastes. Let your family and friends complement your creation with their favorite toppings.

Q. I just purchased a waffle iron. Can you give me tips on how to use it correctly?

A. Follow the helpful tips below to make perfect waffles in a snap.

  • Before you begin cooking, always coat the inside of the waffle iron (grid plate) with nonstick cooking spray or wipe with a paper towel lightly coated with oil. Be careful that you don't get a buildup of oil on the grid plate as this will impart an off flavor to your waffles.
  • Once the waffle iron is hot, it's time to add the batter. When doing so, do not fill the entire grid plate with batter as there will be no room for expansion and batter will overflow the sides of the waffle iron.
  • Every waffle iron has a signal to let you know when the waffle is done. As a general rule, however, a waffle is done when steam no longer escapes from the waffle iron and the waffle is lightly browned and crispy.
  • Don't throw away leftover waffles -- simply save them for a quick breakfast, dinner, or dessert. Let them cool completely and then wrap in plastic wrap and freeze. To serve them, pop the frozen waffles into the toaster.
  • Finally, be sure that the waffle iron is clean before storing it. For simple and quick cleanup, unplug the waffle iron while it is still warm. Slightly dampen several paper towels, place them on the grill plate, and close the waffle iron. Once the steam stops, open the waffle iron and remove the paper towels -- your waffle iron is sparkling clean in just seconds.

A stand mixer should be a staple appliance in every kitchen. Continue to the next page to find out why the stand mixer is a necessity and how to use it.

For more helpful kitchen appliance tips and recipes, see:

How to Use a Stand Mixer

All stand mixers offer hands-free operation, allowing you to simultaneously work on other parts of the recipe.
©2007 Publications International, Ltd.

Q. I just moved into a new house. What small kitchen appliance is a must-have for my new kitchen?

A. Kitchen tools come and go. Some work and some don't -- most end up collecting dust because they are hard to use and tough to clean.

One tool that has stood the test of time is the stand mixer. You may have watched your grandmother use one as she was mixing dough for your favorite holiday bread. Mom probably let you scrape the bowl clean after she whipped up one of her special cake frostings. You may have received one as a wedding gift and never used it. Whatever the situation, the stand mixer is definitely a kitchen tool worth examining.

Advertisement

Q. I'm thinking about purchasing a stand mixer. Are there different types to choose from on the market?

A. Thanks to American ingenuity, we have several choices when it comes to stand mixers. Before purchasing one, do your homework. Decide how often you bake and the type of baking you do. Less expensive mixers may be the right choice for casual bakers, while the more expensive models with a variety of attachments may suit more serious bakers.

Q. What is the advantage of buying a stand mixer over a portable one?

A. Stand mixers offer several advantages over portable mixers. First, all stand mixers offer hands-free operation, allowing you to work on other parts of the recipe while batters and dough are mixing. Second, the design provides for more even mixing, and finally, since the machine is stationary, the chance for accidental spills is also reduced.

Q. Which attachments do I need?

A. This choice depends on both the model you choose and the types of baking you do. Less expensive models may only come with beaters. For the occasional baker this is really the only attachment you will need. You can easily make most cake and cookie batters, frostings and icings with the beater attachment.

Bread bakers and serious cake makers might want to purchase a model with interchangeable attachments. The three most common are the whisk, paddle, and dough hook; each is designed for a specific mixing technique.

The whisk incorporates air into liquid mixtures, such as egg whites and cream. As the whisk rotates faster the mixture becomes thicker and creamier. Meringues, frostings, and thick sauces are all made using this attachment.

The paddle is used for mixing thicker and heavier cookie and cake batters where the incorporation of air is not critical to the recipe.

The dough hook is used for mixing bread dough of all kinds. The design of the hook is excellent for pulling sticky dough away from the side of the mixing bowl.

All models come with a large mixing bowl; some come with extra smaller mixing bowls.

Q. How many speeds do I need?

A. A simple way to determine the number of speeds you might require is to think of speed in ranges of slow, medium, and fast. A model with numerous speeds is really just offering more speeds in each range.

Q. What else should I know about stand mixers?

A. Whether you purchase an inexpensive model or a deluxe one with all the attachments, remember that the mixer is only a tool. Always follow the recipe.

Most recipes call for exact ingredient amounts, so measure carefully.

If the model you purchase does not have a timer, it's probably a good idea to purchase one. The timer will help ensure that you are beating the mixture to the correct consistency.

It is always a good idea to clean as you go; batters dry quickly and make cleanup more difficult.

Your baking magic can begin, now that you're better acquainted with this helpful and easy-to-use kitchen tool.

The cookie press is an easy way to create fun and festive cookies. Continue to the next page to find out more about the cookie press.

For more helpful kitchen appliance tips and recipes, see:

How to Use a Cookie Press

A cookie press can also be used in place of a pastry bag to decorate cookies, cakes, and appetizers.
©2007 Publications International, Ltd.

Q. I purchased a cookie press to make festive cookies for the holiday season. Can I use any cookie recipe for my cookie press, or can I only use special cookie press recipes?

A. For best results, follow these tips:

  • Use only recipes specially developed for cookie presses.
  • Follow manufacturer's directions for your cookie press.
  • Shape dough into cylinders and press into the barrel as directed in manufacturer's directions.
  • If dough has been refrigerated and is too firm, allow it to sit at room temperature for 15 to 20 minutes. Otherwise, the cookies will not come out smoothly and may even damage a motorized cookie press.
  • Any frosting or filling with a soft consistency can be used, but make sure any solid ingredients in the filling are finely chopped.
  • Do not grease cookie sheets unless directed in recipe. Pressed cookies need to adhere to the cookie sheet or they will not detach from the cookie press.

Q. I'm attending a holiday cookie exchange party. What type of cookie can I make with my cookie press?

A. A tray of spritz cookies in festive shapes always brings "oohs and aahs" from holiday guests. These little cookies look impressive, but are actually a snap to make with a cookie press.

Advertisement

Q. Is there only one type of cookie press available on the market? Do cookie presses usually come with attachments?

A. A cookie press is made of a hollow cylinder, fitted at one end with a decorative disk, and a plunger for pressing out the dough at the other. Cookie presses may be made of plastic or metal. And, they are available in several varieties: battery-operated gun, manual gun, and manual press with screw mechanism.

They come with several metal or plastic disks, into which are cut decorative designs. As the dough is pressed through a disk onto a cookie sheet, it is shaped into a cookie. The shape can be changed by changing the disk. The most commonly used disks create Christmas-themed wreaths, bells, trees, and stars; but other disks form hearts, people, and animals.

Besides disks for shaping cookies, cookie presses usually come with decorating tips. Fitted with one of these tips, a cookie press can be used in place of a pastry bag to decorate cookies, cakes, and appetizers.

For more helpful kitchen appliance tips and recipes, see: